Deprecated: Required parameter $instance follows optional parameter $settings in /home/u163554763/domains/epoxychina.com/public_html/en/wp-content/plugins/flash-toolkit/includes/abstracts/abstract-flash-widget.php on line 477

Deprecated: Required parameter $setting_key follows optional parameter $settings in /home/u163554763/domains/epoxychina.com/public_html/en/wp-content/plugins/flash-toolkit/includes/abstracts/abstract-flash-widget.php on line 477

Deprecated: Required parameter $field_key follows optional parameter $settings in /home/u163554763/domains/epoxychina.com/public_html/en/wp-content/plugins/flash-toolkit/includes/abstracts/abstract-flash-widget.php on line 477

Deprecated: Required parameter $setting_std follows optional parameter $settings in /home/u163554763/domains/epoxychina.com/public_html/en/wp-content/plugins/flash-toolkit/includes/abstracts/abstract-flash-widget.php on line 477

Notice: Function _load_textdomain_just_in_time was called incorrectly. Translation loading for the jetpack domain was triggered too early. This is usually an indicator for some code in the plugin or theme running too early. Translations should be loaded at the init action or later. Please see Debugging in WordPress for more information. (This message was added in version 6.7.0.) in /home/u163554763/domains/epoxychina.com/public_html/en/wp-includes/functions.php on line 6121

Notice: Function _load_textdomain_just_in_time was called incorrectly. Translation loading for the luckywp-table-of-contents domain was triggered too early. This is usually an indicator for some code in the plugin or theme running too early. Translations should be loaded at the init action or later. Please see Debugging in WordPress for more information. (This message was added in version 6.7.0.) in /home/u163554763/domains/epoxychina.com/public_html/en/wp-includes/functions.php on line 6121

Notice: Function _load_textdomain_just_in_time was called incorrectly. Translation loading for the woocommerce domain was triggered too early. This is usually an indicator for some code in the plugin or theme running too early. Translations should be loaded at the init action or later. Please see Debugging in WordPress for more information. (This message was added in version 6.7.0.) in /home/u163554763/domains/epoxychina.com/public_html/en/wp-includes/functions.php on line 6121

Notice: Function _load_textdomain_just_in_time was called incorrectly. Translation loading for the wpforms-lite domain was triggered too early. This is usually an indicator for some code in the plugin or theme running too early. Translations should be loaded at the init action or later. Please see Debugging in WordPress for more information. (This message was added in version 6.7.0.) in /home/u163554763/domains/epoxychina.com/public_html/en/wp-includes/functions.php on line 6121

Notice: Function _load_textdomain_just_in_time was called incorrectly. Translation loading for the flash domain was triggered too early. This is usually an indicator for some code in the plugin or theme running too early. Translations should be loaded at the init action or later. Please see Debugging in WordPress for more information. (This message was added in version 6.7.0.) in /home/u163554763/domains/epoxychina.com/public_html/en/wp-includes/functions.php on line 6121

Warning: Cannot modify header information - headers already sent by (output started at /home/u163554763/domains/epoxychina.com/public_html/en/wp-includes/functions.php:6121) in /home/u163554763/domains/epoxychina.com/public_html/en/wp-includes/feed-rss2.php on line 8
Projects – Factory Wholesale Epoxy Resin For Table Artcraft https://www.epoxychina.com Buy Clear Epoxy Resin Online | DiamondResin Fri, 15 Oct 2021 07:10:06 +0000 en-US hourly 1 https://wordpress.org/?v=6.8.1 https://www.epoxychina.com/en/wp-content/uploads/2021/09/cropped-DiamondResin_icon-32x32.jpg Projects – Factory Wholesale Epoxy Resin For Table Artcraft https://www.epoxychina.com 32 32 197738187 Epoxy Resin Countertops https://www.epoxychina.com/?portfolio=classic-collection https://www.epoxychina.com/?portfolio=classic-collection#respond Mon, 02 Jan 2017 10:10:11 +0000 https://demo.themegrill.com/flash-default-2/?post_type=portfolio&p=82 Many homeowners want to transform their countertop surface in their homes, but they don’t want to spend too much money or hire a professional to do the job. This is where epoxy countertops come in, it is fairly reasonably priced, and you can pour it yourself over any of your existing countertop surfaces. When it is complete it provides a whole new refreshing look to your countertop and is also tough and will last a long time. In this blogpost, we will be telling you more about epoxy countertops, and how you can save a lot of money by pouring your own Epoxy Resin Countertop.

What are Epoxy Resin Countertops?

These are countertops for use in your home, they are exceptionally resistant to wear and tear, as well as to damage from stains and spills. This type of surface is often found in laboratory environments, as it is resistant to damage from many chemicals and other solutions.

For this reason, an Epoxy Resin Countertop is an excellent surface for your home, especially if you tend to use the surface a lot. Just remember, before you decide to install an epoxy countertop, you need to look at certain aspects include the price. This product is primarily used for refurbishing purposes and will renew and refresh those old damaged countertop surfaces in your kitchen, bathroom and can even be used on your floors.

You can purchase a pre-made Resin-based Countertop that will cost in the region of $50 to $150 per square foot. If it is a fairly large Countertop it could cost $200 per square foot or more. The only drawback is that it may not be exactly what you wanted.

However, you must understand that an Epoxy Resin Countertop cannot be bought as a pre-made item, like a granite slab form, laminated or marble countertops. The genuine epoxy countertops need to be poured or made in place.

Epoxy Resin is referred to as a ‘solid-surface’ material, but to confuse things, so is Corian. However, Corian is man-made from acrylic polymers and other materials and can be purchased in a solid sheet form of ½ inch thick.

Epoxy resin countertop material is extremely popular because of its durability. The surface is designed to withstand scratching and will last for many years before the surface color begins to fade. Another advantage, the epoxy resin surface material can handle most cleaning materials and will never lose its gloss and shine.


Pros and Cons for Epoxy Resin Countertops

Applying an Epoxy Resin to your home’s countertops is a great idea, as it has many advantages. However, you need to seriously consider the disadvantages as well before you tackle your project.


Pros

  • The design potential is unlimited
  • You are provided with a high-shine finish
  • The surface is durable and tough
  • It can withstand a certain amount of heat and if you select the correct product it can be heat-resistant as well
  • The surface, once cured, is food safe and non-toxic
  • The surface is easy to keep clean
  • Due to the seamless surface, your patterns and colors can be continuous

Cons

  • The process of application is very time-consuming
  • The surface can be stained
  • A certain amount of skill is required to apply it
  • Once you have applied, it is extremely difficult to remove


Choosing the Best Epoxy Countertop Resin

You will put in a great amount of time, effort, and money to create an epoxy countertop that you can be proud of. Thus, it is well worth investing in a top-quality epoxy resin that will ensure that your end-result is successful. We have chosen the best brands of epoxy resin according to the best quality, the best value for money, and the most affordable option.

Best Quality: STONE COAT COUNTERTOPS Epoxy Kit

This gallon-sized epoxy kit offers a premium product that, although simple to use, will yield outstanding results. You can expect a coating that is as clear as crystal when you use this product. This resin produces no volatile organic compounds (VOCs), and when cured is highly durable and UV-resistant. This epoxy resin is so easy to use due to its detailed instructions and simple 1:1 mixing ratio. When adding color, you must ensure that you stir the pigment thoroughly for 2 minutes. Once the resin and hardener have been combined, you will have 45 minutes of working time with your epoxy mixture before it begins to harden. The surface will become dry to the touch within just 24 hours, and will be ready for light kitchen use within a period of three days. However, the epoxy will only cure fully after 30 days.

Best Value for Money: SUPER CLEAR Table Top Epoxy Kit

This tabletop epoxy kit is formulated specifically for use with tables, countertops, and bar tops. You can mix most color pigment types with this resin. This product is easy to use and will level itself automatically. You will receive a durable, glossy finish that mimics a mirror’s surface when using this resin. It is also easy to clean and will resist both water and UV light. Once fully cured, your resin surface will be entirely safe for contact with foodstuffs.


Most Affordable: INCREDIBLE SOLUTIONS Table Top Epoxy Resin

This budget-friendly epoxy resin provides a quality product that cures into a transparent, glossy coating that will endure high impact and abrasions. The UV-resistant formulation means that your resin will not yellow over time. This resin will level itself out, resulting in a smooth, glossy finish. When working with this product, you will notice that it emits almost no odor at all. In fact, this product releases no VOCs, making it that much safer to work with. For adding color, it is best to avoid oil-based pigments and instead to opt for a mica powder.

Installation Costs

The installation cost is an important factor to consider before you go ahead with the project. Installing an epoxy resin countertop is not all that difficult, but you need to remember that it may require considerable effort from you. You may have to consider the cost of possibly getting a professional in to help you.

Whatever you decide, you may find that the installation cost may go beyond the complete cost of the countertop. This includes the cost of your own time or that of a specialist. To be safe, it is advisable to add on an extra few hundred dollars to the cost of your materials for the installation.

This applies to epoxy countertops in your kitchen, which is the normal size for a residential installation. On the other hand, if it is going to be more than one countertop or if the area is large, you will need to add a bit more money to your material costs.

is epoxy heat resistant


More Cost Factors to consider

The cost of installing an epoxy resin countertop is indeed more expensive than many other countertop materials like laminates or plastics. However, an epoxy countertop is of a much higher quality than the other countertop materials.

So, an epoxy resin countertop offers durability, and it will give you a surface that needs little maintenance. Over time, it will cost you less and will last for many years. This means that the resin countertops will outlast any of the other countertop materials and will require no replacement for a long time. The extra cost for an epoxy resin countertop could be well worth it over the long term for many.


Epoxy Countertop Costs as a DIY Project

If you intend to refurbish your countertop surface using epoxy, the cost is unbelievably reasonable compared to other countertop materials, such as granite or marble. To provide you with a rough estimate, epoxy countertops can cost around $3 to $8 per square foot when pouring your own epoxy countertop surface.

The final figure will be dependent on the following aspects:

  • The total surface area that you want to cover on your countertop.
  • How thick you make your layers and how many layers you want to pour.
  • Not all epoxy material is the same, so the quality of your epoxy resin will make a difference.

So, if you want to use a cheaper type of epoxy countertop material, it will cost you about $4 per square foot, but if you use a better quality type of epoxy material you could pay around $7 to $8 per square foot.

The cost of installing an epoxy countertop as opposed to granite or marble is a lot less, and if you are on a tight budget, this option is the answer for you. Another option to consider is the laminate countertop material, which is also a more economical choice.


Epoxy Countertops and how to apply it

The DIY epoxy resin countertop consists of a resin and hardener. Both of these two substances are liquids, but when mixed they form a solid surface. Some disadvantages of epoxy countertops are that they can harden fairly quickly, can be quite messy and sometimes it is difficult to work with.

After you have installed your epoxy countertop, you will have a shiny and crystal-clear surface. But if you have used a textured epoxy material, your final result will be whatever texture you have chosen. Once you have finished pouring your epoxy countertop, you may also be able to pour a final protective coat of around 1/8 of an inch thick, this you can do this after the previous layer has properly cured.

When installing your own epoxy resin countertop in your kitchen or bathroom, you will be saving a great deal of money and you will be able to make unique designs. However, there is a word of caution here, it is going to take a lot of hard work and you may not be completely satisfied with the final result.

If you decide to install your own epoxy countertop, you will be able to buy a complete kit. Otherwise, if it seems like too much work, you can hire a professional to do the job for you.


How to go about Pouring an Epoxy Countertop?


Clean your old Countertop Surface thoroughly

The surface needs to be thoroughly cleaned with no dust or dirt, as these will be permanently sealed in the epoxy. Also, if you used a clear epoxy, then these particles will be visible and may even cause a rough finished surface.


Shield Furniture and Floors

When you pour the epoxy, ift comes out in a thickish liquid and can very easily run over the edges of your countertop onto the floor. The epoxy can also run down the cabinet doors, so you need to lay down plastic sheeting to protect your floors and other surfaces. Many people, when pouring their epoxy, put a piece of wood around the edges of the countertop to form a barrier. This barrier will stop the epoxy from running over the edges.


Pour a thin Layer of Epoxy to form a Seal

First, mix your resin with your hardener in a separate container and then pour it out over the countertop. This first thin layer of epoxy acts as a seal and is referred to as flooding. The aim is to lower the number of bubbles when you pour.


The Resin Mixture begins to harden fairly quickly

The epoxy will begin to harden within 20 to 30 minutes, so you need to work quickly. If you notice any air bubbles forming, you need to get rid of them as soon as you can. You can do this by using a blow torch or dryer, which causes the bubbles to rise to the surface.


Before adding a second Layer allow the first to harden

Your first epoxy layer should be hard enough within 4 to 20 hours to pour a second layer, according to the manufactures instructions. After 48 hours, your epoxy should have properly cured, and you will be left with a brand-new beautiful epoxy finished surface on your countertop.

Applying an Epoxy Countertop Coating over a Laminate Surface

When you have discolouration or stains on your laminate countertop, it can spoil the appearance of your countertops in your kitchen or bathroom. The countertop does not need to be removed or replace. This is where Epoxy Countertop Coatings come in, as they offer you a fairly inexpensive method of restoring the appearance of your old countertops. If the epoxy coating is applied correctly, it will provide you with a durable and beautiful surface finish.


Preparing your Laminate Countertop Surface

Before you even think of applying an epoxy coating over your laminate countertop, you need to remove the surface finish of the laminate. You can do this by sanding it down with 80-grit sandpaper, this ensures that the entire top sheen finish of the laminate has been removed.

Once you have done this, you need to put on a pair of rubber gloves and wash the whole countertop surface using a mixture of one teaspoon of Trisodium Phosphate (TSP) with one gallon of warm water. You need to make sure that all the dust particles and residue has been carefully removed.

Next, take some clean water and rinse the countertop off. Make sure to use masking tape or a piece of wood around the edges of the countertop to stop any epoxy running over the edges, and to protect your floor with some plastic sheeting.


Mixing and Priming

We do suggest that you apply an adhesive primer onto the surface of your countertop, using a sponge roller before you mix the epoxy coating. Another primer option available is a primer that has been labelled for use on shiny surfaces. This primer coating will ensure a tough finish for your epoxy coating.

When you are done with the primer coating and allowed it to dry properly, you can mix your epoxy coating. The epoxy coating comes in a 2-part package, a resin, and a hardener. You need to read the manufactures instructions carefully to know how much epoxy you must mix to cover the entire surface of your countertop.

Try not to mix too much epoxy, as you will not be able to use it later or store it. Be careful to only mix the epoxy coating directly before you want to apply it, as it begins to harden fairly quickly.


Applying your Epoxy Coating

As soon as you are satisfied that your primer has dried properly, as recommended by the manufactures instructions, you can start applying your epoxy coating. Start by first applying an even thin layer, using a good quality synthetic or natural paintbrush or a foam roller.

Commence at one of the outside edges of your countertop and then spread the epoxy resin in the direction of the center of your countertop. Wait until you can see the epoxy beginning to set, but is still soft, then using a handheld metal scraper or straight edge, smooth the surface area removing any high spots or bumps.

Next, let the first coat cure properly before you apply the second layer. After you have applied the second coat, use the handheld scraper or straight edge to give you a smooth finished surface by moving over the surface from left to right. Now, let the epoxy cure completely before you make use of your new countertop. Your new epoxy surface will cure to the touch within 24 hours, but you need to wait for around 2 to 3 days before it fully cures, and you can use it.


Finishing your Project

Once you have completed the second layer of epoxy you can remove the masking tape or piece of wood around the edges of your countertop. After the epoxy coating has fully cured, you can apply a top coat of polyurethane to protect your countertop surface.

Take note that when you first apply the polyurethane coating, it may look slightly cloudy to start with. Allow it dry properly for about 5 minutes, and it will become clear. Now, you can apply 4 or 5 more coats of polyurethane, allowing each coat to dry properly before you apply the next one. We suggest you leave your countertop for about 12 hours before you start making use of it.


Different Types of Countertop Designs

The use of epoxy resin countertops provides some breath-taking options when it comes to color, designs or patterns. You can accomplish this by taking your old countertop and create special designs and patterns on the surface or add special effects inside the epoxy.

Furthermore, you can embed certain objects into your epoxy resin. Many homeowners use pieces of old tiles, coins, or bottle caps to create a mosaic effect in the epoxy. Some have even gone a step further and embedded LED lighting in the resin, which gives your countertop a glowing effect.

This may all be nice, but nothing beats the look of a clear epoxy coating that covers a beautiful hardwood countertop. Not only is this true of wood, but epoxy coatings can be applied to many other surfaces, such as Formica or Laminate, which give it an added gloss finish and shine.    


Using Epoxy Resin to create various Color Designs

The epoxy resin and hardener are transparent materials, but you can add different colors to make various patterns and designs. Many manufactures of epoxy resins give their customers the option of choosing various color finishes by providing them with resin tints.

This process begins by choosing a base color, then you can add another color, also known as an accent color, which enhances the base color. This process allows the finished surface to look like natural stone. The most common base colors are silver, red, gray, white, copper, and green. To enhance this base color, you can then add a metallic powder.

Many manufactures also add glitter to their epoxy resins, these are used for greater effect when combined with a basic color. So, if you are looking to produce a marble or granite-like finish with your epoxy, the choice of color combination is just the start of the process. You will need to apply special techniques to give you the veins, patterns and swirls that are found in a piece of real marble.


Keeping your Epoxy Countertops clean

Keeping your countertops clean is easy, as you can use most types of cleaning products as well as cleaning methods without causing any damage to the surface of your countertop.


How to keep the Shine and Lustre of your Epoxy Surface

Just apply a small quantity of mineral oil to the epoxy surface once a week or even once a month. The mineral oil keeps the epoxy surface bright and shiny, but if you use too much oil it will cause the surface to become dull and cloudy. So, if you find you have applied too much oil, take a clean cloth, and wipe the excess off. Take care, as your epoxy surface can easily stain, depending on the quality epoxy material you used. However, if you have used a good quality top brand epoxy, then you should not have this problem.


Avoid using abrasive Cleaners

Abrasive cleaning materials leave scratch marks and cause the epoxy surface to become dull and lose its brilliance. They also tend to show the swirl marks you used when cleaning. We recommend you avoid using polishes, waxes or scouring pads when cleaning your countertop surface. The best-recommended product we suggest for your countertop is Puracy Cleaner.


Try to avoid Stains

When a spill occurs on your countertop, wipe it up straight away using a washcloth or paper towel to avoid any staining. If you only become aware of the stain later, you still have an opportunity to fix it before any permanent damage is done.


Here is what you need to do:

  • Mix 4 parts of baking soda to 1 part water
  • Spread the mixture directly onto the stain and let stand for 5 minutes
  • Take a clean cloth and wipe the paste mixture off and hopefully, the stain will be gone


If the stain is still there, you need to:

  • Dip a clean cloth in some paint thinner or acetone
  • Gently rub over the stain in a circular motion
  • If the stain does not come out straight away, just add a little more pressure while rubbing


Note: Never attempt to remove the stain from your countertop by using bleach, as the bleach will cause a stain of its own.


Questions and Answers


Can Epoxy Resin be used on Countertops?

Yes, if you apply the epoxy resin correctly on your countertop, it will give you a durable and tough surface. Because the epoxy is not porous it will be resistant to any moisture. The normal Epoxy countertop is also heat resistant to a certain degree, which means you cannot place a hot pot straight from the stove onto the surface. There is, however, an epoxy resin that is specifically manufactured to resist excessive heat.


Is the Epoxy Countertop scratch-free?

Although the normal epoxy countertop is extremely durable, it may show signs of scratch marks if you did not treat it properly. By choosing the correct product, it will not only be moisture resistant but also scratch-resistant. This is why an epoxy countertop is great in a kitchen environment.


How much does epoxy Countertop cost compared to Granite?

Yes, a granite countertop is more expensive. However, an Epoxy countertop gives you a durable and non-porous surface and lasts a long time, while granite countertops do not offer all of this. Let us compare prices; how much does epoxy countertop cost? It will range from $70 to $130 per square foot, whereas a Granite countertop ranges from $95 to $225 per square foot.


Is it possible to lay an Epoxy Countertop over a Laminate Surface?

If your laminate countertop has become discolored or damaged there is no need to replace it. By applying an Epoxy coating over the laminate surface your countertop will look as good as new. You will also have a more durable and long-lasting countertop surface.

]]>
https://www.epoxychina.com/?feed=rss2&p=82 0 82
Different Applications for Dried Flowers https://www.epoxychina.com/?portfolio=vintage-collection https://www.epoxychina.com/?portfolio=vintage-collection#respond Mon, 02 Jan 2017 10:09:39 +0000 https://demo.themegrill.com/flash-default-2/?post_type=portfolio&p=80 Resin is a very versatile substance and has many uses, but for the DIY enthusiast embedding items in resin is always popular. You can embed small trinkets, coins, stones, beads, bottle caps and, of course, flowers. Flowers are delicate, beautiful, and perfect to embed in resin, preserving their beauty. In this article, we will explain in detail how to go about preserving flowers in resin.

Different Applications for Dried Flowers


 There are numerous applications for dried flowers such as:

  • Used in various teas.
  • Can be sealed in a sachet and will keep your dresser drawers smelling fresh.
  • Dried flowers can be molded into the wax to make candles.
  • Often used in beauty care products like body scrubs etc.
  • Dried flowers can also be used to make birthday cards and special gifts.


However, in this article, we will be concentrating on how to preserve flowers in resin. Here are some of the different applications for dried flowers in resin.  We will also be dealing with the question; do you have to dry flowers before putting them in resin?


Wedding Bouquets

Your wedding day is a special occasion, which takes a lot of time and preparation as well as money. This is especially true for your flower bouquet; it is a great pity to see all of that just wilt away within a few weeks after your wedding. A popular idea is for you to preserve your wedding bouquet in resin. This will last for many years and whenever you look at it, all the special memories will come flooding back.


Botanical Coasters

You can preserve dried flowers in resin this way, and these coasters will add a beautiful touch to your decor. It is also a good idea to use as a gift for a kitchen tea or Mother’s Day, or even for someone’s birthday.

Cell Phone Cover

Your cell phone is always nearby, and you handle it more than any other object during the day. Want to pretty it up? Why not place some flowers in resin on the back cover.
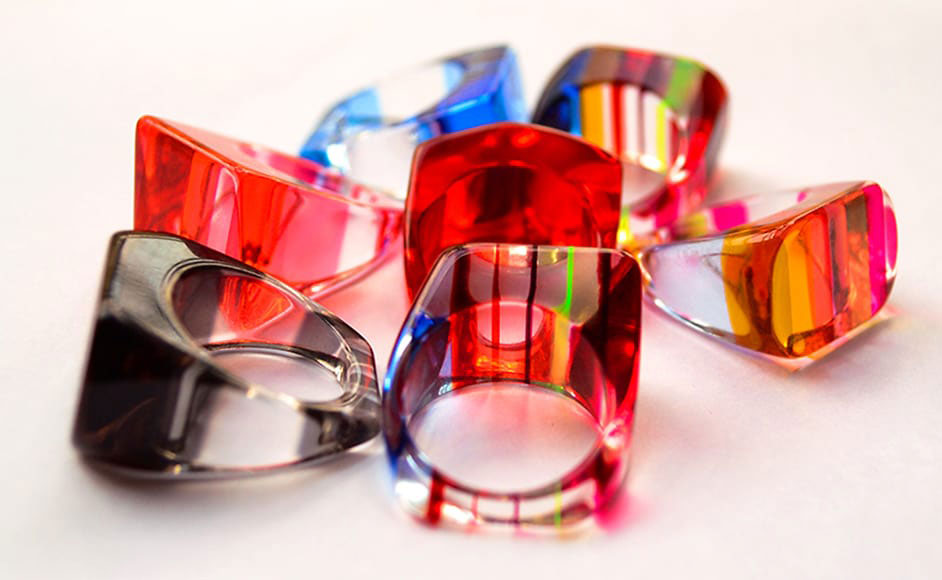
 

Jewelry

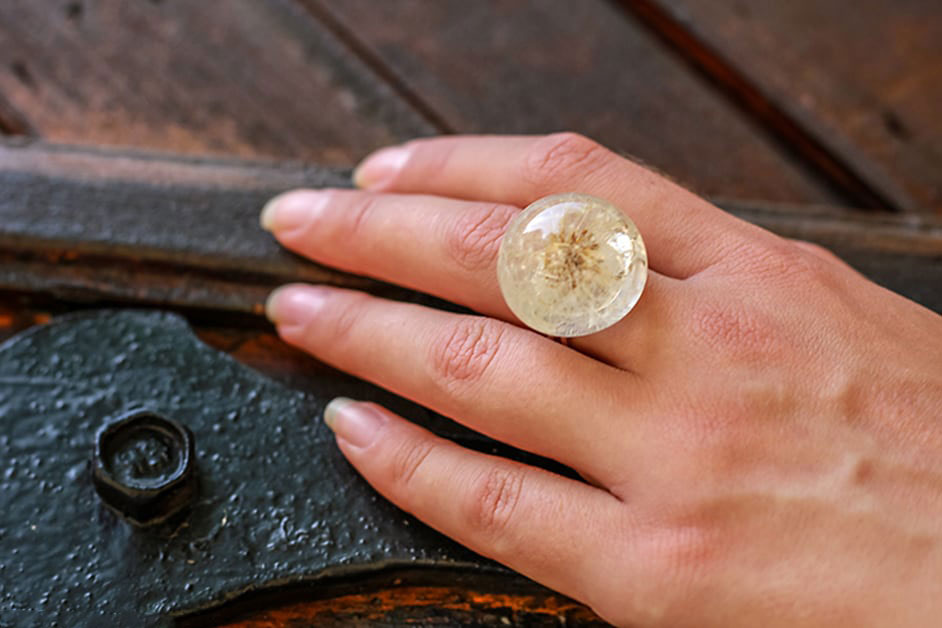
When it comes to resin jewelry, there are so many different applications you can use with dried flowers. Preserving flowers in the resin can be done with necklaces, bracelets, pendants, rings and so much more.


Flowerpot Holders

Instead of having plain plastic flower pots around the house, you can make them look so much more attractive by encasing them with dried flowers in resin.


Picture Stands

Do you have family pictures just lying in a draw or cupboard? Why not create a picture stand with dried flowers in resin, your memories can be displayed in your living room for all to see and enjoy. If you prefer to hang your pictures on the wall, you can make your own picture frame with resin flowers.


Paper Weights, Wind Chimes or Sun-Catchers

I have seen many amazing paperweights made from different types of materials and embedded items. Here is an opportunity to make your own unique paperweights with flowers in resin. You can also use flowers in resin to create amazing wind chimes and sun-catchers.


Sure, there are many more applications for dried resin flowers but let us now have a look at what you require to create flowers in resin. Are you ready to take up the challenge and create that special something?


Needed Materials for Flowers in Resin

If you have decided to use used dried flowers for your project and want to know how to preserve the flowers in resin, then these are the materials you will need to complete your project.


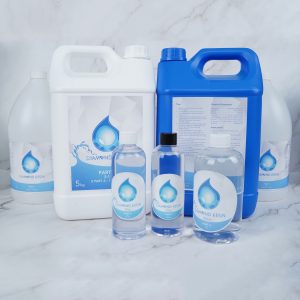
Best Resin for Preserving Flowers

There are many different brands of resin on the market, which one you choose is important to the success of your project. Many artists use the following:

For smaller molds with optimal hardness and almost no air bubbles:

Diamond Supplies Art Resin – 1 Gal Pro Art Resin Kit – Art Resin Epoxy Clear – Easy to Use – High Gloss Intense Shine – Ideal for Photography, Wood, Artwork


For bigger molds without producing too much heat when curing and crystal clear look:

INCREDIBLE SOLUTIONS Deep Pour Clear Casting Resin
  • 2 : 1 mix ratio by volume (100 A to 44 B by weight)
  • Thick pours up to 2″ per application, low viscosity and long working time
  • Super clear results, compatible with pigments and dyes

You are looking for resin products that have a high-gloss lasting finish, have a low odor, are non-flammable and non-toxic. Also, a resin that is self-levelling and cures fully within 72 hours is perfect for these types of projects.


Molds

Depending on what you want to do, you will need silicone molds. You can purchase these in many different sizes and shapes.

LET'S RESIN Silicone Resin Coaster Molds, 7 pcs
LET’S RESIN Silicone Resin Coaster Molds, 7 pcs
  • Heart mold, round mold, ellipse mold, rectangle mold, square molds, tweezer, finger cots
  • Very suitable for making resin coasters, jewelry holder, flower pot holders, bowl mat etc.
  • Made of high-quality silicone, very flexible and durable


EU TENG HAO Silicone Resin Casting Molds, 18 pcs
EU Silicone Resin Casting Molds, 18 pcs
  • Package totally have 18 items
  • It includes 1 sphere, 1 cube, 1 diamond, 1 triangular pyramid, 2 measurement cups, 2 different crystal stone molds, 10 wood sticks
  • Very flexible, easy to clean and it re-usable, not easily damaged
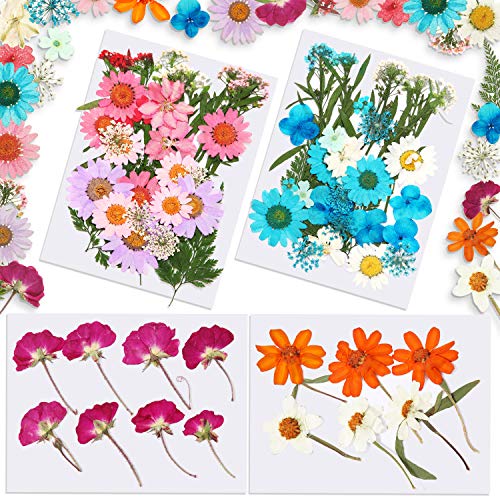
 

Dried Flowers

You can use any flower you like. Remember, flowers must be completely dry for your resin project to come out properly.

BBTO Natural Dried Flowers Set, 84 Pieces
  • 4 packs natural dried pressed flowers including 84 pieces dried flowers altogether
  • Vacuum packaging helps to avoid moisture to keep the flowers dried
  • These multiple-color pressed flowers are easy to use

Mixing Cups

Some plastic or paper cups for mixing the resin in.

8oz Measuring Mixing Cups
  • The most important thing for mixing epoxy is that you use exactly the right amounts. If you don’t exactly keep the units, the resin won’t cure and will remain tough.
  • For the exact measurement you should therefore use a special stirring cup with exact measurements.


Craft Sticks or Popsicle Sticks

These are used to mix the resin with.


Toothpicks

These come in very handy to pop the air bubbles that form after pouring the resin.


Heat Gun or Hair Dryer

Sometimes it is necessary to use these tools to get rid of the bubbles in your resin.

WAGNER SPRAYTECH Heat Gun
  • Two Temp Settings 750ᵒF & 1000ᵒF

  • Use the heat gun to remove air bubbles from your epoxy

  • You can also use the air flow to customize your artwork as long as the resin is flowing

Sandpaper

To finish your resin flowers off properly, you will need some fine sandpaper. The grit size you will need is 150; 200; 400; 1000 and 3000-grit.


Respirator, Safety Goggles, and Nitrile Gloves

This equipment is essential for your safety and protection when working with resin.

Safety Works Multi-Purpose Respirator
  • As toxic fumes can be produced when processing resin, we recommend that you wear a respirator mask when processing resin in rooms.
  • Even though professional resin promises to be non-toxic, we believe that health comes first and you can eliminate any negative effect.


Plastic Drop Cloth

This cloth is there to catch any of the resin you may spill and saves you a lot of time in cleaning up afterward.


Different kinds of dried Flowers

Two kinds of flowers are available for preserving in resin and they are Real Flowers and Artificial Flowers.


Real Dried Flowers bought online

Real Dried Flowers are available at your local florist where you will be able to choose what type of flowers you want and the quantity you need. Then there is the option for buying your real dried flowers online, which are available at Amazon, Etsy and many more stockists. However, when you buy online, they usually come in bunches of various kinds of flowers. Some of the flowers you may not make use of, you will also have to take the quantities supplied to you.

COOL DIY Natural Dried Flowers for Resin
  • Sealed packaging, high quality dried flowers, each pack includes 34 pieces
  • Different sizes, so you have a wide variety
  • Ues for nail sticker, phone case making, resin jewelry making

Artificial Flowers

Artificial Flowers are also available from your local florist, you can also purchase them from your local house and home retail stores. Here again, you will be able to buy exactly what you need and in the quantities you require. Again, the artificial flowers are also available online from Amazon, Etsy, and others. Here again, you will have to take the quantities offered, and you will not be able to choose one or two separately.


Dry your own flowers

This is a far better solution than buying. You can pick your own fresh flowers and you can choose exactly the type and quantities you need. All you need to do is take them home, dry them out and you are ready to create your own resin flowers project.


Dry your Flowers yourself – Step by Step Instructions

Drying flowers and leaves to preserve them is an old technique, and it is effective in preserving their beauty for years to come. Let us now consider the various techniques you can make use of when you want to dry your own flowers:


Pressing the Flowers in a Book

This technique for drying flowers can be done in two different ways; using a large heavy book or a flower press. This method will flatten your flowers which will allow you to frame them and hang them on your wall. Flowers with thin petals are best suited for this application like Gladiolus, Delphiniums, Pansies, Poppies, Geraniums and much more.

This is how it is done:

  • You need to go and pick the flowers you want to press and ensure that you pick them after the dew has dried. You also need to decide if you want to include the leaves and if you want the flower that has fully bloomed or is still in its bud stage.
  • Make sure you get them pressed quickly before they have a chance to wilt. Now place the flowers in your book between two sheets of absorbent paper to protect the pages of your book or between two smooth sheets if you are using a flower press.
  • All types of flowers take different times to dry but to be safe leave them to dry for 3 to 4 weeks. It is better to leave them for too long then you will be sure they are dry otherwise they will be damaged.
  • Your pressed flowers are now ready for you to use on gift cards, wedding invitations, for decorating cakes, decorating candles, in frames as a picture and many many more uses


Pros

  • This is an easy and cheap method to use for drying flowers.
  • It does not require any special ingredients or complicated instructions.
  • Leaves your flowers beautiful and flat.
  • Can be used for many craft projects, as well as being a fun activity for kids to do.


Cons

  • The process can take up to 4 weeks to complete.
  • Unfortunately, the full beauty of the colors and vibrancy are not always retained with your flowers.
  • This method makes your flowers brittle and delicate, they can easily break if not handled with care.
  • Flowers are flat
  • If moisture gets in, the flowers can go moldy.


You can also use parchment paper for this method instead of a book. Simply place your flowers between two layers of parchment and then put something heavy on top.


Drying in Silica Gel

This technique for drying flowers is quick and effective. The first step is to select the flowers you want to dry. The best flowers to use with this method are delicate flowers like lilies. It is also a good idea to pick your flowers before they are fully open.

Next, you need to choose what type of material you want to use to dry your flowers with. There are several options available for you:

  • Silica Gel or silica sand: This is the fastest method and the material is easy to buy from your local supply stores. It is also fairly cheap and can be used over and over again.
  • Borax and White Corn Starch: This is very cheap, easy to use and readily available. Just mix 1 part of Borax with 6 parts of Corn Starch.
  • Fine Sand: This is a much slower method, which is cheap to do and readily available. The idea is not to cover the flowers with the sand, instead, lay them on top of the sand so that the sand can support them. Now leave them and allow the air to slowly dry them.

You need to select a suitable container to use that can take the whole flower with its stem. If you use silica gel you need to select a container that can seal airtight. For the Borax and Sand, you just need to select a container that is strong enough.


Place the flowers into the selected container and follow these steps:

  • Pour some of the silica gel or sand into the container to measure about 1 or 2 inches (2,5 or 5 cm) deep.
  • Next, place your flowers into the silica so that they stand upright.
  • Some flowers like snapdragons and delphiniums dry better when they are lying flat.
  • You can now pour more of the silica over the flowers until they are completely covered.
  • You need to place the container in a dry and warm area and leave them to dry.
  • Silica Gel dries flowers faster in 2 to 4 days. Keep a check on your silica and see if it turns pink, this means it has absorbed all the moisture it can take.
  • Borax, on the other hand, will take about 5 to 14 days to dry the flowers.
  • Sand can take much longer, usually up to 21 days.
  • It is now time to remove the dried flowers from the material you used. Clean them off using a soft small brush, and once cleaned use some hairspray to keep them from breaking up.


Pros

  • This is one of the quickest methods for drying flowers but will still take a couple of days
  • With this method, you can preserve the whole flower
  • It is a very cheap and easy technique
  • You will not lose the amazing colors of your flowers


Cons

  • If you pour too much material over the flowers or you pour it too quickly, you could damage the flowers.


Hanging it up to dry

This method is the easiest, as all you have to is hang the flowers out and leave them to dry. The type of flowers most suited for this method is whole bouquets, roses that are very robust and smaller types of flowers that are long-lasting, such as lavender.


Here is a step by step process for you to follow:

  • First, remove the leaves off the stems and cut the stems to about 6 inches long. If you want to keep the vibrant colors of your flowers, you should start the drying process as soon as possible.
  • Next, take the flowers and tie a rubber band or piece of string around the stem of each flower or the stems of all the flowers in your bouquet.
  • Your flowers are now ready to be hung out to dry. You can attach the string or rubber bands to a coat hanger or rod and hang them upside down to dry. It is preferable to find a dark place where the air is dry and has good ventilation.
  • You need to dry the flowers for around 3 weeks, to ensure they are completely dry. Then remove them and spray them with unscented hairspray, which helps keep them protected.


Pros

  • With this method, you can preserve the complete flower and not just the petals
  • You will be able to preserve the complete bouquet without separating the flowers.
  • You will not lose the amazing colors of your flowers.
  • Unlike fresh flowers, dried flowers can last for many years.
  • This method is very easy and costs you nothing.


Cons

  • Your flowers will only completely dry out after three to four weeks.
  • If you don’t start with the process as soon as possible, you will be in danger of losing the vibrant colors.
  • After the drying process, the flowers will be stiff and can break easily.
  • Some flowers like roses, for example, can shrink in size slightly.
  • You should not air dry Orchids, as they take a long time to dry and lose their color.


Microwave Flower Press

You will need 2 flat microwave-safe ceramic plates, some coffee filters, and a microwave.

  • Your materials need to be placed in this order, plate face-up, a coffee filter, your flowers, another coffee filter and the last plate face-up.
  • Place in the microwave for only one minute and then remove.
  • Check to see how dry your flowers are, replace the coffee filters and microwave again as before.
  • Continue with this process until you are satisfied your flowers are completely dry.


Pros

  • It is one of the quickest methods for drying flowers, as they dry within minutes and you do not have to wait days or weeks.

Cons

  • As all flowers do not dry at the same temperature, there is the possibility that you may overheat your flowers and destroy them.


Microwave with Silica Gel

Like the method above, it is meant for the impatient pressers that want results in a hurry. Both techniques are perfectly safe, as the microwave radiates heat, which heats the moisture in the flowers and allows the vapor to escape, thereby drying out your flowers. The flowers most suited for this type of drying are roses, daisies and most white and pale-colored flowers.

This method is very quick and all you will need is a microwave-safe container, some silica gel, and a microwave. The silica gel is used to keep the shape of your flowers, you can use it more than once and is obtainable form any craft store.


  • Look for a microwave-safe container that is large enough to take your flowers, but not too big that it won’t fit into your microwave.
  • Pour the silica gel into the container to cover the bottom, about an inch or two thick. Next, arrange your flowers on top of the gel, blossom-up and then pour some more silica gel on top. Pour carefully so as not to damage the flower, pour until you have covered the petals completely.
  • Put the container, without the lid, into the microwave and set it to the desired temperature. Not all flowers dry at the same time, so you need to use a trial and error system here to achieve the best result. Set your microwave for two heat levels above defrosting for about two to five minutes. Check it from time to time and increase the heat if needed.
  • When you are satisfied your flowers are completely dry, open the door of the microwave and cover the container with the lid straight away. After you have removed the container from the microwave open the lid slightly in one corner and leave it for about 24 hours.
  • Remove the petals from the gel and very carefully clean the gel off of the flowers by using a fine brush, then spray them with an acrylic spray to preserve them for longer.

The Pros and Cons are the same as for the Microwave Flower Press. We should warn you about the Silicone gel get extremely hot, do not handle the gel or the container until it has cooled.


How to Preserve Flowers in Resin – Tutorial

We now come to the part where we will take you step by step through how to preserve flowers in resin. Casting or embedding various items in resin is a technique used which can preserve items for an exceptionally long time. We have already seen what type of materials you will need and also how to buy your dried flowers or how to dry them yourself. Now, we will see how to cast flowers in resin.
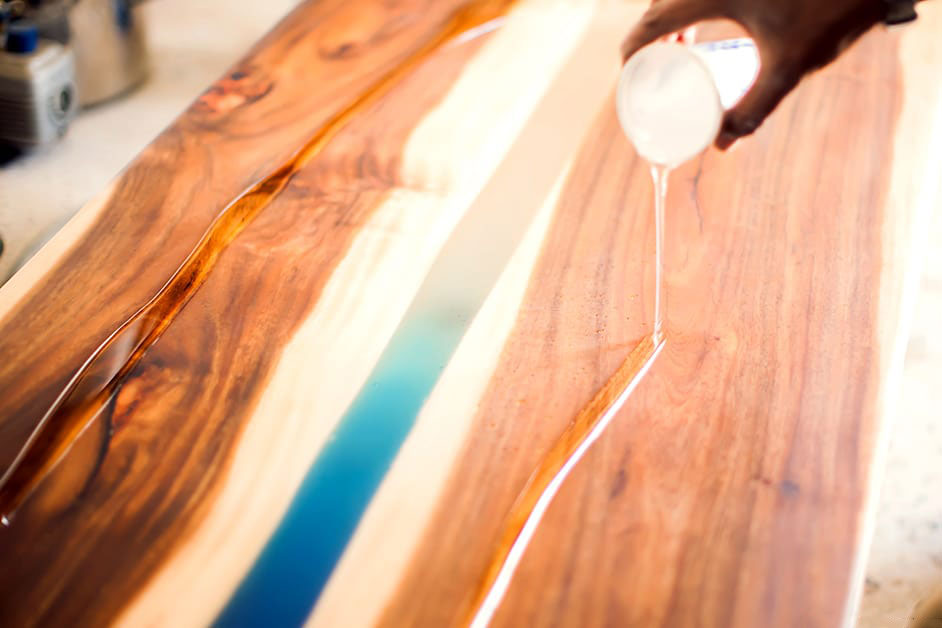
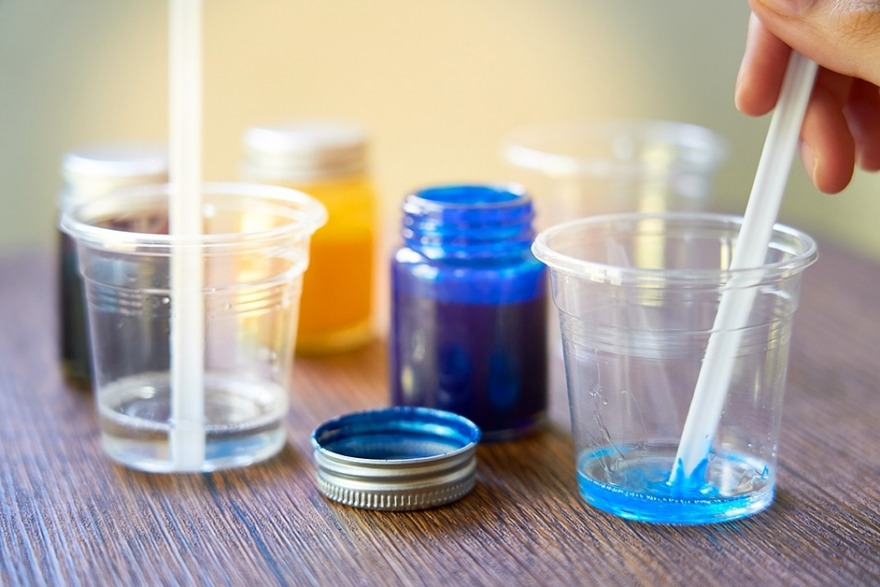
 

Mixing the Resin

First, get everything you will need ready and close by. Be sure you protect yourself properly by wearing nitrile gloves, a respirator or mask and safety goggles.

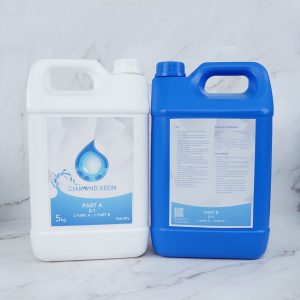
Take your plastic or paper cups and start to mix the resin using your craft or popsicle sticks. Make sure you read the manufactures instructions properly. The casting resin usually comes in two parts and is mixed in a 1:1 ratio. You have 1-part resin added to 1-part hardener.  However, some brands use a 2:1 ratio, which means 2-part resins to 1-part hardener. So, make sure you mix exactly as the instructions tell you.

If you mix incorrectly, you will have a brittle resin casting, or it will remain sticky and will not fully cure. Make sure you mix it slowly and thoroughly, some say about 200 revolutions, while others say for at least for 3 to 4 minutes.

We recommend you use a clear resin, so you can see your flowers clearly after it has cured. Next, leave it to stand for a minute or two so that the bubbles can rise to the top. If the bubbles do not disappear, use your toothpick, or heat gun to remove them.

In doubt as to how much resin to mix? Here is an indication of what you can use: If your container measures 12 x 12 inches and you pour a standard first layer of 1/8 inch, then you will require 2.5 ounces of resin and 2.5 ounces of hardener.


Pour the base and place the flowers

Now it is time for you to pour your resin into the mold. You need to keep in mind that the resin you mixed will start to cure between 12 and up to 48 hours, which gives you enough time to work.

Take the size and shape of the mold you have chosen, preferably silicon, and make sure you clean it properly. You do not want any particles of dust or other objects in it. Lay the mold flat on your work surface, making sure it is level. Pour the first layer of resin in the bottom of your mold and make sure it covers the whole area.

Depending on how deep your mold is or how thick you want your finished product, we suggest you pour more than one layer. This will also ensure your flowers will be in the middle of the resin, providing a floating effect. Make sure you remove any air bubbles at this stage by using a heat gun or toothpicks.

You are now ready to place your flowers in the resin. Before you do, make sure they are completely dry, as moisture will cause them to go brown. Lay them gently down on top of the resin and by using your craft or popsicle stick, arrange them how you want to give them that 3-D effect. We also suggest you lay your flowers face down, as the bottom of your mold will become the front side of your finished product. This step needs to be followed as your flowers are lighter than the resin.

Make sure that no air bubbles have formed under the petals of the flower, if they have, now is the time to remove them. Let the first layer cure but keep an eye on your flowers, ensure they stay in place and do not shift.

Remember, always read the manufactures instructions, as certain resin brands require you to pour your second layer before the first layer has cured properly. This allows both layers to bond properly.


Casting the Mold

When you are satisfied the flowers are properly set and in place, it is time to cast the top layer. You need to cover the flowers completely and fill the mold with the resin.


Removing Air Bubbles

Make sure any air bubbles that have formed are removed with a toothpick. Some artists have mastered the technique of using a drinking straw and blowing softly over the resin, in this way the bubbles are removed.


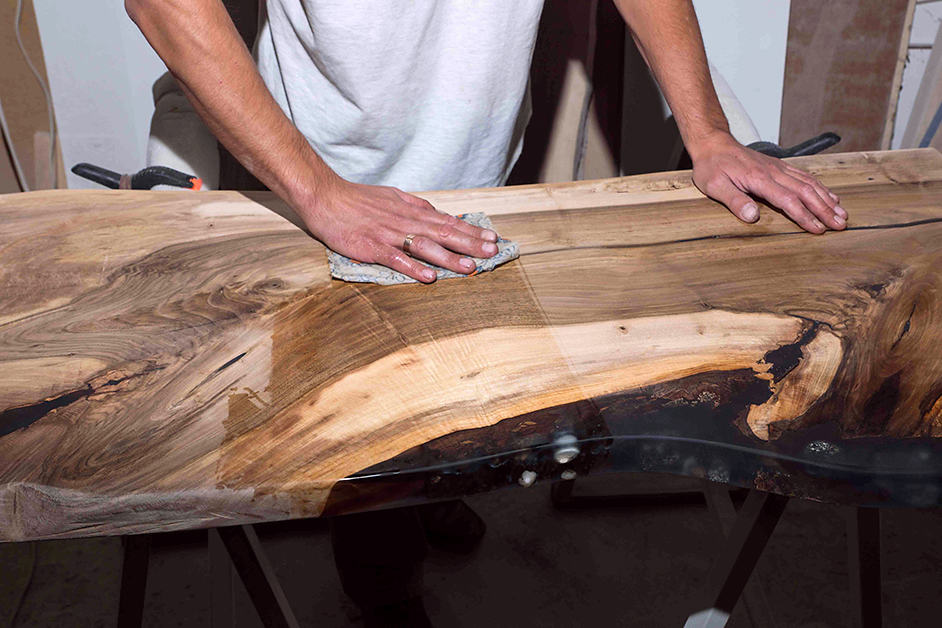
Curing and Finishing

Allow the resin to cure properly, this will differ for all resins so follow the manufactures instructions to be sure. Most resins will dry to the touch within 24 hours, but to completely cure it will take between 48 and 72 hours.

After the resin has properly cured, you can remove it from your mold. At this stage, if you find that it is still slightly flexible, level it out properly and give it more time to become hard and properly cured.

Now comes the cleaning part and finishing your resin flower off. At the back or along the edges, you resin flower may be slightly rough. By using fine sandpaper these marks can easily be removed. If you have used a silicone mold, there should be no need for any sanding down, as your product should be perfectly smooth and shiny. We do recommend that flowers in resin are kept out of direct sunlight, as the sun may cause the flowers to lose their radiance.


Tips and Tricks

Here are some tips and tricks that may help if you are tackling how to preserve flowers in resin for the first time. The flowers referred to below are a variety of colors, delicate blooms, small flowers, bright-colored and white flowers, but you can use whatever flowers you like.


Is it better to seal the Flowers before casting in Resin?

Yes, if you give your flowers a protective coat before you cast them, it will stop the resin from causing any change to your flowers.

Remember, flowers are organic substances and can trap air bubbles and by sealing them you prevent the bubbles from forming in the resin. Sealing your flowers also keeps them from crumbling and keeps them in a more rigid shape. This type of process has different results when applied to dried flowers as opposed to fresh flowers.

There appear to be two methods used for this process and we will show you how below:


The Glue Sealing Method

This simple, you just need to cover them with some clear glue or ModPodge. As both of these products can be fairly thick, you need to thin them by adding some water. Make a solution of thinned glue and dip the flowers into the solution, or you can use a fine soft brush and carefully brush the glue over both sides of the flowers. This method is easy to do and it keeps your flowers in their original shape, however, some of the flowers may lose their bright colors.


Results for fresh Flowers:

  • Lilacs: The glue changed the color of the flowers to brown.
  • Cherry Blossoms: The glue changed the color of the flowers to gray.
  • Common Daisies: Because the petals are so thin they kept sticking together and the color changed.
  • Japanese maple: The thinner parts of the petals curled slightly.
  • Buttercups: The petals appeared to repel the glue and formed a lump in one place.
  • Daisies: The glue changed the color of the petals to green.


Results for dried Flowers:

  • Lilacs: The glue changed parts of the color of the flowers.
  • Cherry Blossoms: The glue caused the petals to crumble and stick together.
  • Common Daisies: All the petals stuck to each other.
  • Japanese maple: There appeared to be no change at all.
  • Buttercups: All the petals crumbled slightly.
  • Daisies: There appeared to be no change at all.


The Hairspray Method

Another method to seal your flowers is to spray them on both sides with hairspray, or any lacquer spray. This method is easy to do and it keeps your flowers in their original shape, but it is a very sticky and messy job and the flowers need several layers.


Results for fresh Flowers:

  • Lilacs: The spray discolored the flowers and left them in one horrible brown blob
  • Cherry Blossoms: The spray made the petals transparent and they stuck to each other.
  • Common Daisies: The petals turned green and stuck to each other.
  • Japanese maple: The leaves turned slightly transparent.
  • Buttercups: The petals appeared to crumble slightly.
  • Daisies: The petals turned slightly transparent.


Results for Dried Flowers:

  • Lilacs: The color of the flowers never changed but it lost volume.
  • Cherry Blossoms: The flowers became very fragile.
  • Common Daisies: The petals became very thin.
  • Japanese maple: They turned out good.
  • Buttercups: They turned out flat but very nice.
  • Daisies: They looked very nice.

You may be wondering if you have to seal dry flowers before putting them in resin. Please bear in mind a lot depends on the type of resin you use, and some types of flowers need a sealing coat, or the flowers will discolor. You might have to take your flowers one at a time and test them with each method before you put them in the resin.


  • Lilacs: The best method to use is dried flowers.
  • Cherry Blossoms: These flowers work best when fresh and sealed using the glue method.
  • Common Daisies: The fresh method was found to be the best for these types of flowers.
  • Japanese maple: All the methods used turned out well but the dried flower method was the best.
  • Buttercups: The best method for these flowers was the dried flowers.
  • Daisies: Both the glue and the spray changed the colors of the flowers, so the best method to use would be the dried flower method.

There is another method for sealing your flowers. You can use a plastic laminating pouch or some clear tape and sandwich the flowers between the two surfaces. Next, we will be looking at can fresh flowers go in resin?


How to Preserve Fresh Flowers in Resin

Do you have to dry flowers before putting them in resin? To be able to preserve fresh flowers, we need to learn how to cast fresh flowers in resin. Fresh flowers always have the most amazing colors and beauty, you want to make them last forever. The first thing we need to learn when working with fresh flowers is to try and keep them as fresh as possible for as long as possible. To do this you need to keep them as cool as you can, they can last in your fridge for a couple of hours. You can also just make sure they are in a cool and dry space.

In this section of the article, we will try and teach you how to cast fresh flowers in resin. The first question that comes to mind is, can fresh flowers go in resin? The answer to this question is no, as fresh flowers are organic and if you fail to dry them completely before you put them into the resin, they will turn brown and rot.

The solution to this problem is to dry your flowers first. The other solution is to seal your flowers before you put them into the resin. It is so much easier just to put your fresh flowers into the resin mold and fill it with your resin. However, if you do this then the results will be as follows:

  • Lilacs: The resin discolored the flowers and turned them brown.
  • Cherry Blossoms: All the petals of the flowers shrunk in size.
  • Common Daisies: All the petals lost their color and became transparent.
  • Japanese maple: The area where the flowers were thinner began to curl.
  • Buttercups: Most of the pollen from the flowers leaked into the resin.
  • Daisies: Became transparent.


Roses in Clear Resin

Roses are such beautiful flowers and it is a shame to see them go to waste after such a short time of enjoyment. So, why not preserve your roses in clear resin, you can then enjoy them for many more years to come.

Here are 3 steps for you to follow to make this exciting project a reality:


Dry your Roses

  • Choose the roses you want to embed and make sure you pick or buy them before they fully bloom. This helps to retain the vibrant color.
  • Remove most of the leaves from the stem and the few remaining leaves will add a nice touch to your design when it is finished.
  • Take a piece of string and wrap it around the stem of the roses a few times. Make sure you tie them tightly so they do not come loose.
  • Take the bunch of roses and hang them up to dry, and make sure they are not directly in the sun. They should take around 7 to 15 days to dry properly. You need to keep a check on them every 2 to 3 days to see they are drying properly.
  • Once they are fully dried remove them from the bunch and cut the rose from the stem. If you want to use any of the leaves in your design, remove them from the stem and when you arrange the flowers in the resin you can set them how you want to.
  • To do the final drying you can use a conventional oven set at 100° F (38° C) for 2 to 3 hours. Lay the roses out on a baking sheet and put them into the oven on the lowest rack.
  • You can also use a microwave oven to do the final drying, which saves a lot of time as it can be done within 2 or 3 minutes. However, for this, you need to put the roses into silicon sand or gel first. After removing from the microwave, allow to stand for 24 hours before you use them.


Prepare the Resin

  • It is suggested that you use some clear polyester casting resin if you want to see your rose clearly once it has cured. This type of resin is also much slower in drying, which gives you more time to properly arrange your flowers.
  • If you want a tinted finish, you should use epoxy resin. This type of resin cures faster but it also lasts longer than polyester resin.
  • Before you cast your resin, be sure to work in a well-ventilated area and use protective wear such as nitrile gloves, goggles and a respirator or mask.
  • Choose the mold you want, which can be plastic but silicon or latex-rubber is better. These are more flexible when having to remove your mold. Measure the amount of resin you need for your mold, follow the manufactures instructions.
  • Pour the resin into your mixing cup and add the hardener, this is usually a mixing ratio of 1:1.
  • Stir the solution properly with a craft or popsicle stick for at least 1 minute, making sure it is properly mixed.


Create your Mold Item

  • Pour your first layer of mixed resin into the mold.
  • Next, lay your rose on top of the resin and arrange it as you want, including the leaves.
  • Pour the remaining resin over the rose until it is completely covered. If the roses rise slightly that is ok.
  • Now, wait for about 10 to 20 minutes and check if the resin has started to set but still pliable. Push your rose further into the resin if it floated up until it is in the position you want.
  • Let the resin cure for around 4 hours or until you feel it is hard. If it is still sticky leave a little longer to cure.
  • Remove your rose from the mold. If you used the correct type of mold you will have little or no finishing to do. Leave to cure properly for a further 24 to 48 hours.


With this type of process, you will be able to preserve your rose for a long time in the form of a paperweight or any other type of project you can think of.

]]>
https://www.epoxychina.com/?feed=rss2&p=80 0 80
How to make Resin Rings – Resin Rings DIY Guide https://www.epoxychina.com/?portfolio=classic-watch https://www.epoxychina.com/?portfolio=classic-watch#respond Mon, 02 Jan 2017 10:09:02 +0000 https://demo.themegrill.com/flash-default-2/?post_type=portfolio&p=78 Looking to try out a new hobby and not sure what to do? Working with Resin is becoming a popular hobby as you have a variety of creative projects you can try. One of the more popular and easier projects to start with are Resin Rings. Let us have a look at how you can make your unique Resin rings.

Why are Resin Rings so popular?

If you like being creative and you do not mind going down the DIY road, you can easily make your custom-made resin ring. There are so many ideas you can try out and the techniques involved are all easy and almost everybody can do it. Depending on the products used and how you make your resin rings, they should last for a long time.

You can easily purchase the products from your local crafting stores or there are plenty of products available online. This way you can begin your resin craft project by using an available mold. On the other hand, if you are more experienced, you can start from scratch and begin by creating your own mold. This means you can customize your ring even more. There are plenty of tutorials and videos available online on How to make resin rings, as well as workshops and courses you can take.


epoxidharz-schmuck-herstellen-1


What Supplies do you need for Resin Rings?

Preparation is always important, so what materials do you need to get started?

  • Casting Epoxy Resin
  • Resin Ring Mold (you can make your own) or blank rings with bevel cup, which has some depth
  • Resin colors and pigments
  • Fillers: glitter, dried flowers, beads, photos etc.
  • Wax Paper or Resin Work Mat
  • Latex Gloves
  • Small measuring cups 3 or more
  • Squeeze condiment bottle (optional)
  • Blow Dryer
  • Toothpicks and a few popsicle sticks
  • An empty box or container to cover your work
  • Quick Drying Adhesive
index-Diamondresin10
Stone Coat Countertops Super Cast
  • This thick pour super cast epoxy is designed to be poured over 3/4” per pour
  • Super clear results, compatible with pigments and dyes
  • Perfect for epoxy tables and deep resin molds


How to make Resin Rings – Tutorial with Bought Mold


Working with a bought mold, here is a Resin rings DIY guide.


Preparation

How to make a resin ring begins with proper preparation. Lay your wax paper down and have everything ready to work with on your worktable, in a well-ventilated space. The wax paper or resin mat is just there to pick up any resin that might drip down. Make sure you have a level table, so the resin mixture can also remain even during the curing process.

Lay your fillers and all your other supplies out, while you are busy with this place your resin and hardener into some hot water. Warming them up will help to prevent any air bubbles and also the mixture will mix more thoroughly.

Note: If you are using a blank ring, you won’t need a mold. Simply place the ring upright in some craft play-doh. Roll the doh out into a long cylinder form, so you can add more than one ring.


Resin Mixing and Coloring

Your Casting Epoxy Resin is easy to work with. You have your Resin and your hardener, which you then mix in a 1:1 ration, or equal parts of each. You should follow the instructions on the labels exactly. You will have two measuring cups, one for the resin and the other for the hardener, each with the same amount inside. Mix these in another cup thoroughly, making sure to scrape the sides and bottom of the cup.

You can now add your resin color to the mixture, blend thoroughly with your mixing tool or popsicle stick. At this stage, you can also add glitter to the mix. If you want to make more than one color, you will have to make these in separate cups with your resin mixture.


The Casting Process

Once you are done mixing, you can then pour into your mold. You can also pour your resin into a condiment bottle, for more precise pouring.

Adding a filler: First, pour a layer of resin into your mold and then add your items. If you need to, pour another layer of resin over the item. Be careful you do not fill your mold too much.

Once your resin has been poured, take a toothpick to get all the bubbles out. You can also take a hairdryer on low with high heat, but make sure to hold it at a distance and slowly bring it straight down. You do not want to blow the resin out of your mold. Since it is such a small piece, a toothpick should be fine.

Note: For your blank ring, you will be pouring straight into the bevel cup. This will only take a small amount of resin, but you will follow the same process as above.


Let it cure

The resin takes 24 to 48 hours to cure completely. Make sure to cover with a box or container, so that no dust or anything else can get into your resin while it is still curing.

Note: For those who do not want to wait for the curing process, you can use UV Resin. You do not have to mix it and it cures in only minutes using a UV light. The UV resin is great for smaller pieces like jewelry.


Demolding

Once the resin has fully cured, you can remove the items form the mold. The correct curing time should be on the resin product label along with instructions. Sometimes sharp edges form, so handle carefully when demolding your item.

You can also use a mold release spray, which helps with the demolding process. This spray should be applied before you pour in your resin mixture into the mold.


Polishing and Finish

Once you have demolded your item and you find some sharp edges, you can remove these with a fine-grit sandpaper. To get a nice shine, you can also use some resin polishing paste. Apply the polish with a soft cloth. Using Crystal Clear Resin will also add to the clear gloss effect.

There are also specific molds you can purchase which have a smooth surface and provides the smooth surface. A polished silicone mold is perfect for your resin jewelry projects. The round ring molds provide a solid resin ring. Other jewelry molds provide different shapes and designs, which you can then simply glue onto a ring base.


How to make simple Resin Ring Molds

How to make a resin ring molds? This may take a few tries before you get it right. The simplest way to make your own mold is to buy a Silicone mold-making kit. All you need to go along with this is a choice of a ring or rings you want to replicate. You can easily purchase some cheap rings from local stores, as you do not want to ruin your personal rings.

The silicone mold kit should have instructions for you to follow, but here are a few basic steps.

  • The kit comes in two parts A and B
  • Mix equal parts (ratio 1:1) thoroughly until the color seems even.
  • You can eventually form the mixture into a ball
  • Press down and flatten a little
  • Take your chosen ring and press it into the mold
  • Leave the ring in for about 25 minutes and then remove it.
  • Wait for the mold to form properly for about 48 hours, after this, you can add your resin.

You can then follow the process as described above to make your resin rings.


Custom made Resin Ring Molds

You can go even further to create your resin ring custom designs by using clear silicone. This process is a bit more difficult than simply using a kit, but it is a lot more fun to do. Let us have a look at how you can make Resin rings DIY.

You will need:

  • Small tea-light candles
  • Craft knife, carving tools, a pin
  • Piece of pipe or another tool that matches your ring finger diameter
  • Small Brush to brush away the wax pieces
  • Appliance to melt the wax
  • Sugru, which is moldable silicone rubber putty.


First, take the candle out of its metal covering and remove the wick, then put it back. Next, melt the wax inside its container and allow it to set again. The reason you do this is to create more of an even wax consistency. The wax before you do this is not very even or smooth and this will affect the outcome of your resin ring. The best way is to use an electric stove and slowly heat it.

While the wax is still a little soft, you can make your hole in the middle using your pipe or another tool. Once you have done this, place the wax in some cold water to set properly. Remove the centerpiece you have cut and then remove the candle holder from the rest of the wax.

You can now cut or sand the hard wax to create a more even ring shape. You can now carve out your design using the tools at your disposal. Finally, sanding it down a little for a more even surface. Work carefully with the wax, making shallow incisions, you do not want to slice right through or create cracks.

Keep some cold water handy and place the wax into it now and again. This is just to keep the wax from melting too much when handling it. Next, use the Sugru to create your mold, a similar process to your silicone mold. Sugru is a type of putty made of silicone rubber, which can then be molded into whatever shape you need it to be. Commonly used in repairing a huge variety of items from electronics and more. You have 30 minutes to work with it and after 24 hours you will have a flexible and strong silicone rubber.

You can even take it a step further by making your own mold mixture from silicone caulk and cornstarch. Combine the silicone and cornstarch in a 1:1 ratio. Search online for Oogoo, and you should come up with some tutorials showing you how to make this using these simple ingredients that might be found around the house.

Once you have made your custom mold, you can then move on to create your unique resin rings.


Frequently asked Questions


How long do Resin Rings last?

As with many things, if you look after it, the resin rings should last a long time. This will depend on how well the ring was made and how well the ring is looked after.


Tips to help your Resin Rings last longer

  • Take note of the resin quality and type. Epoxy Resins are best for this type of craftwork. Is the resin made for doming or molding? What brand is best? Always consider these questions.
  • All Resin yellow’s overtime, but depending on the brand, you can get products that will lengthen the time before yellowing sets in.
  • You should still store and keep your resin ring away from direct sunlight. You can wear your ring outside but avoid prolonged exposure.
  • Avoid leaving your ring where there is extreme heat, as it can become damaged. For example, do not leave it sitting in direct sunlight in your car.
  • The resin can pick up scratches on the surface. Rather take off your resin ring before you wash dishes or do gardening.
  • Many creams, lotions, perfume might have chemicals that could cause long-term damage, especially harsh chemicals such as nail polish remover. Try to remember to remove your ring before using any of these products.
  • Keep your ring in a cool, dark, preferably airtight container.
  • If you have a mixed media ring, such as metal and resin, again using high-quality metal is important to how long your resin ring will last.


]]>
https://www.epoxychina.com/?feed=rss2&p=78 0 78
Epoxy Resin Wood Lamp – Step by Step Tutorial https://www.epoxychina.com/?portfolio=mac-product https://www.epoxychina.com/?portfolio=mac-product#respond Mon, 02 Jan 2017 10:07:58 +0000 https://demo.themegrill.com/flash-default-2/?post_type=portfolio&p=76 In this blogpost you get an exclusive tutorial on epoxy resin wood lamps. I’ll show you step by step how you can make these unique pieces with resin and wood and which materials are best suited for this. You will get important insider information and I will tell you what you should pay attention to so that these noble artpieces also succeed.

How Did the Idea of making Epoxy Resin Wood Lamps appear?

Since childhood, my brother and I have dreamed of creating crafts. We tried to make different products: chandeliers from a wooden wheel, wooden handles, pictures, etc. The idea of making epoxy resin wood lamps appeared on Pinterest. Our first attempts were not satisfying but we didn’t stop. After some time, we found our style, but we are still improving on things. After visiting some conference about starting a business, I met a young man who made wooden toys. He showed me the website known as Etsy. All of these circumstances have inspired me to move in this direction and make my dream come true.

Supplies for Making an Epoxy Resin Wood Lamp

  • Wood (Oak, Roots)
  • Suitable Epoxy Resin
  • RGB LED Light
  • Module for RGB Light
  • Varnish for Wood
  • Plexiglas
  • Hot-melt Glue
  • Sandpaper
  • Polishing Paste
  • Wax for Wood
  • Cable
  • Silicone Glue
  • Hardener

Step by Step Tutorial for Epoxy Resin Wood Lamp

Preparation

  • Our work doesn’t start in the workplace. Let’s take a look at what happens before that. You have to go to the forest or any other place where you can gather old oak stumps. If this is not possible, you can buy wood in the shop or order online. Choose good quality stumps that are not rotten or destroyed.
  • The next step is to bring them to your workplace and cut them into the pieces you need for your lamp. We use a band-saw to cut off the angles and to shape it. When you are done with that, put all of your wood in a place where it can dry for some time.

Preparation of the Wood Consists of Several Stages

  1. Rough Cleaning: For this process, use a knife or metal brush to clean the mud and tree bark off of the wood. You’d better do it outside or find a suitable place for such dirty work.
  2. Deep Cleaning: This stage follows exactly after rough cleaning. Using an airstream compressor, blow small pieces of mud and dust from the wood to make it completely clean.
  3. Varnishing: At the last stage of preparation, you must cover the wooden pieces with varnish and leave them to dry for 24 hours.

Preparation of the Lamp Work-Piece

While our wood is drying, take some Plexiglas and cut it into pieces. The size of the pieces depends on the size of the lamp that you want to make.

Tip: Choose the size of the lamp according to the room where you or someone else wants to put it. If the room is big, try to make appropriate lamp so that it can lighten the room and create a special atmosphere.

You will then take the clean and varnished wood pieces and glue them to the Plexiglas bottom with hot-melt glue. In the end, the walls of the Plexiglas work-piece must be glued together in such a way that you get an empty box with a wooden bottom.

Pouring the Epoxy Resin

  • At this stage, we will work specifically with epoxy resin. Here we use epoxy resin of Ukrainian production which has already tested to make sure that it is perfect. First, weigh the resin and hardener separately – the proportion is 100 to 27.
  • Put the epoxy resin and hardener in one container and mix everything for 15-20 minutes. To clean the mixture, strain it through a filter that gathers all dust and pour into the ready-made work-piece.

  • After that, put the work-piece with epoxy resin mixture in the degasser so as to take away bubbles (for approximately one hour if the room temperature is 20-24 degrees Celsius). After one hour of degassing, leave the product to solidify for two to three days in a place with a room temperature of 18 to 24 degrees Celsius.

Finishing the Work-Piece

  • Finally, you are close to completing your epoxy resin wood lamp. After two to three days of drying, take off the Plexiglas from the solid work-piece. You now have your lamp but it is still unfinished.
  • Then take some wood and cut out the bottom. Inside the bottom, insert an LED light that is the size of the lamp. For this, cut a small concavity in the wooden bottom with a manual milling machine. This concavity is for the LED light. Take your LED light and glue it to the bottom.

  • In addition to that, make holes in this wooden bottom for a cable and a soldered cable for the LED light. You now have the light in your lamp. I buy my LED lights from a local shop with a voltage of 100-240 V. An RGB LED light can be controlled with a cell phone programmer using Bluetooth.
  • The next step is to join the bottom of the epoxy resin work-piece. To do that, you can use silicone glue. When you are done with that, don’t forget to leave the lamp to dry for one day.
  • After drying you will see that the surface of the lamp is rough and uneven. To take that away, grind all sides of the lamp using sandpaper and a grinder machine. You have to be patient and start from grit size 60 and grind for approximately 5 to 10 minutes. You have to change the grit of the sandpaper each time to achieve better results. So you would move from grit size 60 and increase it to size 120, 240, 320, 400, and 600 step-by-step.
  • The sanding process doesn’t stop at this stage: as this is a handmade product, you will need to use your hands. Sand the lamp with your hands using sandpaper grit size 1000, followed by 1500 and 2000. When you grind or sand lamps with your hands, you should make the surface of the lamp a little bit wet.

Finishing the Lamp

One of the last steps is polishing the epoxy resin surface of the lamp with polishing paste for car headlights. Finally, chafe the lamp with some wax. Now you can hold your lamp in your hands and feel satisfaction from the result that you can see.

I hope that you can do your best following my tutorial. But don’t forget to express your ideas and your dreams in your creation! Don’t make a copy, make a masterpiece – it is priceless!


]]>
https://www.epoxychina.com/?feed=rss2&p=76 0 76
Best Marine Epoxy Paints and Marine Epoxy Resins https://www.epoxychina.com/?portfolio=old-gadget https://www.epoxychina.com/?portfolio=old-gadget#respond Mon, 02 Jan 2017 10:07:18 +0000 https://demo.themegrill.com/flash-default-2/?post_type=portfolio&p=74 When choosing your epoxy, it is important to take note of the material you are going to be working with. Marine-grade epoxy is what you will need if your project is going to be exposed to or submerged in water. This could include things like boat repairs, repairing of pipes, amongst other projects. The various epoxies available each have their own features, which in turn have pros and cons attached to it. So, by doing a bit of research and getting informed, you will be able to choose the correct marine epoxy resins suitable to your needs.

What is Marine Epoxy Resins?

As mentioned, marine epoxy resins are needed for those projects that are going to be constantly exposed to water. Think of a boat hull and underwater pipes, which is submerged in water. You need epoxy resin that is durable, versatile, and reliable, especially if it is going to be exposed to a harsher environment. Once the marine epoxy resin has fully cured, it becomes waterproof and offers great strength.

Choosing the correct Marine Epoxy Resin

When the time comes to buy your marine grade epoxy resin, you need to consider a few things. This type of product can be purchased as a thick liquid or paste. For the thick liquid, you can get a filler powder, which allows you to thicken when needed. Otherwise, the thick past resin includes a hardener when you buy it.

Helping you make the right choice you need to consider the following:

  • You need to choose the epoxy that is best suited for the project you are working on.
  • Always check the shelf-life, an epoxy resin product should be used according to the recommended date. You might encounter problems if the use-by date has expired.
  • A liquid epoxy along with a filler is a better choice, as these products are all ready to go when required, especially in an emergency.
  • Make sure to follow instructions when it comes to mixing the resin and hardener. Take note of the time you have to work with the epoxy resin. Remember, take note of any requirements related to temperature as well as humidity.
  • Do some research, you will come across polyester resin, which is considered a resin, but it does not have the durability and strength the epoxy resin has.
  • Always wear protective wear when working with epoxies such as gloves and eye goggles. Have ready some mixing sticks and containers for your epoxy.
PRO MARINE Marine Grade Epoxy Resin
  • Bonds with fiberglass, wood, etched aluminum, and bare steel and lead
  • Easy to apply by brush, roller, syringe, spreader, or by pouring
  • Kit comes with resin, hardener, pumps, and pump calibration instructions

Marine Epoxy Resin Applications

All epoxy resins are similar and have bonding, coating, sealing as well as water-resistant properties. This makes epoxy resin great for a variety of applications. The different types of resin you get are your tabletop resins, art resins and, of course, the clear marine epoxy resin. The marine-grade epoxy is more often used in structural boat repairs and maintenance.

This specific type of epoxy can be used with a variety of materials including:

  • Fiberglass
  • Wood
  • PVC
  • Ceramic
  • Certain Metals
  • Concrete
  • Types of plastic

Best Marine Epoxy Resin

TotalBoat Epoxy Resin Kit for large areas

TotalBoat 5:1 Epoxy Resin Kit
  • Include enough 5:1 marine epoxy resin and hardener to complete a variety of boat building, composite construction, and epoxy repair projects. For use on wood, fiberglass, reinforcement fabrics, etched aluminum, bare steel, and lead. Not suitable for clear-coating applications
  • Ideal viscosity for wetting out fiberglass cloth and other reinforcement fabrics. Self-leveling properties are ideal for coating and laminating. Combine with fillers to make a high-strength, moisture-resistant fairing compound, filleting material, or adhesive
  • Pot life ranges from 12 minutes @ 75°F for Fast Hardener, to 20 minutes @ 75°F for Slow Hardener. Cures to a high-strength, moisture-resistant, light amber plastic solid that can be sanded and shaped

You can easily apply this marine epoxy using various tools such as a brush, syringe, roller, or spreader. You can also just take the resin and pour it over things like lead, wood, reinforcement fabrics, etched aluminum, and bare steel. This particular marine grade epoxy when cured provides excellent durability. The marine epoxy also protects from moisture and once it cures, forms a solid plastic that appears amber in color. This is not a Clear marine epoxy.

The TotalBoat Marine Epoxy Kit contains the following:

  • Resin and hardener
  • Mixing items
  • Plastic cups for mixing
  • Gloves
  • Container Pumps

The container pumps have already been adjusted so they provide exact amounts. All you need to do is add five full pumps of resin to one pump of hardener. The TotalBoat Epoxy Resin works well with all other 5:1 marine grade epoxies. You can also choose between kits that include either quartz or gallon sizes. There is also a selection of fast or slow hardener.

Let us have a look at some Pros and Cons to TotalBoat Epoxy Resin

Pros

  • Can easily be used with all other marine grade epoxies
  • The marine epoxy is self-leveling, which is perfect for coating and laminating
  • The kit comes with epoxy and hardener pumps, providing exact amounts
  • Comprehensive kit that can be used on numerous repair or building ventures

Cons

  • Can’t really use the resin in cold weather conditions
  • Not suitable if you are looking for clear marine epoxy

J-B Weld 8272 MarineWeld Marine Epoxy
  • A two-part epoxy cold weld system that provides strong, lasting repairs to multiple surfaces. Perfect for all DIY marine and watercraft repairs.
  • After mixing the tubes at a 1:1 ratio, it takes 4-6 hours to set and 16-24 hours to cure
  • Once cured J-B Weld MarineWeld can be tapped, filled, sanded, molded and drilled. J-B Weld MarineWeld’s set and cure color is dark grey

If you need small repairs done on your boat, then this two-part epoxy cold weld system will provide you with superior results. The marine grade epoxy is tough and can tolerate even the harshest environments. The final cured product can also be shaped, filed, sanded, and drilled as required.

Setting time for the marine epoxy takes around four to six hours and is fully cured by 15 to 24 hours. When the epoxy has fully cured, it is darkish gray in color. You can even compare this epoxy to steel once cured, as it becomes so hard and strong. Durable and a wise choice for all your boat or related repairs.

The product itself is fairly simple to use and can be done by most anybody, no need to call in a professional. Can be used for a variety of projects and applied to many surfaces like aluminum, metal, fiberglass as well as plastic and wood.

Let us have a look at some Pros and Cons to J-B Weld MarineWeld Marine Grade Epoxy

A general guide to using Marine Epoxy

Let us have a look at a few basic steps when using your marine grade epoxy.

  • Begin by roughening your surface you want bonded, by using some good quality sandpaper. You can also try draw-filling spots. Once done, always make sure your surface is clean of any dust, dirt, or grease.
  • Now, take the provided syringes and cut off the tip ends. Hold it upright and then push it down slowly into your resin and hardener. Make sure any bubbles move to the top.
  • After this is done, take the double plunger and push down. Make sure to use a clean container or plate you can dispose of. Otherwise, use the epoxy tray.
  • Gently pull back on the plunger, wipe any residue from the tip and close with cap.
  • Next, stir your resin and hardener thoroughly for several minutes.
  • At this point you can add a small amount of adhesive to the item you want bonded. Gently, set it up and then steadily push together. Each product may have differing curing or setting times, so always have a look at the manufacturer’s instructions.
  • Finish by removing any surplus epoxy.

Pros and Cons of Marine Epoxy Resins

Pros

  • Strength and durability
  • Strong bonding and adhesion properties
  • Creates a bond to a variety of surfaces
  • When curing, it has little shrinkage
  • Damage and moisture resistant
  • Has fewer toxic hardeners
  • The epoxy has a long shelf-life

Cons

  • Product is expensive
  • Has low resistance to UV
  • May not bond effectively with a Gelcoat
  • While applying, it might be susceptible to environmental changes
  • You need to be extremely precise when mixing the resin and hardener

Casting Resin

Casting resin is used for casting molds, it is especially popular in making jewelry. The resin is thinner than your coating resin and has a variety of mixing ratios for different applications. You can work longer with the epoxy resin because it has a slow curing time. The casting epoxy resins can be used for industrial applications. For example:

  • Enclosing items
  • Filling in gaps or spaces in wood
  • Laminating of surfaces

Coating Resin

As the name implies, the resin is used for coating objects and can provide a surface for ceilings and floors. The resin helps to bond, coat, and seal objects. The resin is thicker than the casting resin and has a faster curing time. The coating resin usually also has easier mixing ratios.

The Epoxy coating resin usually supplies a clear finish, which can be used for things like:

  • Surfboards or a boat deck
  • Overlaying of furniture and other objects

UV Resistant Marine Grade Epoxy Resins

The epoxy, by itself, does not come with UV resistant properties. UV Resin is UV resistant, usually have an additive included. The UV additive is added to help prevent any yellowing of the resin over time.

Applications

There are UV Resistant Marine Grade Epoxy Resins available, which provides a longer duration of its non-yellowing effect. The UV resin is an excellent product to use for boat building applications as well as in the process of manufacturing fiberglass. UV resins are also used for smaller projects such as in the making of resin jewelry. The resin is also excellent in sealing small areas and works best as an epoxy resin adhesive.


UV Resistant Epoxy Pros and Cons

Pros

  • Fast curing time with the use of UV light.
  • There is no wearisome mixing involved
  • The resin has a longer processing time, so no need to rush

Cons

  • The product is more expensive than regular epoxy resin
  • The shelf-life of UV Resin is short, 6 months.
  • You can only apply thin layers of UV Resin, and you require several 3mm-4mm layers.
  • For the curing process to work effectively, you need a UV lamp.

Polyester Resin

This consists of unsaturated synthetic resins, which can be composed of a variety of different polyesters. Polyester resin is a major player within the composite industry.

Polyester Resin Applications

The polyester resin has many applications and can be used in many different types of projects. The resin is popular in the boat building industry and in repairing plastic items. Some of the more popular applications include the sealing of things like Jacuzzis and swimming pools. The product can also be used in various outdoor construction projects that require weather-resistant properties.

Polyester Resin Pros and Cons

Pros

  • Polyester resin is a lot more affordable
  • You can determine the processing time by adding more or less hardener to the polyester resin. The weighing and measuring must be done accurately for a good result.
  • The design time is more flexible
  • You have your choice of reinforcing fabric for your building projects. Glass fiber mats or fabrics etc.

Cons

  • During processing, there is a definite odor
  • When compared to epoxy resin, the polyester resin falls short in many areas. Polyester resin is less water-resistant and durable.
  • Polyester resin does not bond to smooth surfaces such as glass or metal.
  • High shrinkage rate

Polyurethane Resin

Polyurethane resin is also a synthetic resin and a type of plastic. The resin is very versatile as it can be used in a variety of applications. The resin can be altered to form materials that are pliable or into something more rigid or hard. In most cases, the polyurethane comes in liquid form, which can then be poured into molds. Additives and fillers can also be added to the polyurethane resin, which can produce the properties you want in your end product.

Polyurethane Resin Applications

As mentioned, the resin is versatile and can be used in both industrial as well as by those at home. Here are a few applications for polyurethane resin:

  • Paints can be created from Polyurethane resin, as well as adhesives and other coatings
  • Casting tires and mold casting
  • Encapsulating electronic components and parts
  • Production of foam
  • Floor coatings

Polyurethane Resin Pros and Cons

Pros

  • Easy to work with
  • Has a workable viscosity, which helps to cast and shape it as desired.
  • The resin easily accepts a variety of additives and fillers
  • Little shrinkage occurs during the curing time
  • After curing, it has a high resistance to heat
  • You do not have to wait long to de-mold objects
  • Hardens quickly

Cons

  • You need to include additives to increase its UV resistance
  • After curing, you cannot weld it.
  • There are emissions or odors during the curing period
  • Adhesion properties are not as good as the epoxy resin
  • The resin is moisture sensitive, which reduces its durability

Repairing your boat with Marine Epoxy

In many cases, a boat may have incurred more damage than just on the surface. The core structure of the boat may have been affected. If this is the case, repairing the boat will require expertise and knowledge as well as time and money. You may want to think about getting in a professional for this type of job.

The modern fiberglass boats tend to be stronger than wooden boats, but this does not mean any damage will not occur. If your fiberglass boat has been damaged, you have to first evaluate what and how much damage has occurred. You will have to decide whether you will be able to fix the damage or does something need to be replaces altogether.

Once the problem has been pinpointed, you can go ahead and repair or remove the damaged parts. The first step in repairs, is to prepare the damaged section for bonding. Also, if you had to remove your core material, always replace with the same, ensuring it has the same shape and thickness. When it comes to the fiberglass skin and you find that it is still whole, you can then make use of it again. However, if this is not the case, you can then make a new skin to cover the core. This should be done in several tapered layers of epoxy and fiberglass.

Marine Epoxy Paint

To finish off your boat repair or maintenance, you need to make it look good with some marine epoxy paint. Most paints are formulated to be effective for exterior applications, especially for marine environments. The paints usually add a layer of protection, water-resistance and can handle extreme conditions.

You will need to fist clean your surface you wish to paint. You will need to sand the clear marine epoxy until it becomes dull and wipe the surface. Then apply the marine epoxy primer, this takes a couple of layers. Finally, add your marine epoxy paint over the primer. Make sure to add a minimum of two layers of paint.

Preparing your boat for Marine epoxy paints

A few guidelines when preparing your boat for painting.

  • Clean your boat completely, make sure all sand, dirt and grease has been removed. It may be best to clean the boat out of the water using a high-pressure hose, a scrapper, and old cloths.
  • Raise any hardware you can from the boat or watercraft. Remove anything that should be removed, as you do not want water seeping into any cracks, which could cause damage. Any hardware you cannot remove should be covered with some painters tape to protect it.
  • The waxy coat on the surface of the boat can be removed by using a solvent. Preferably use a watercraft solvent and a few coarse sponges. Make sure the waxy coat is completely removed.
  • You can now do any repairs needed on the surface before you begin to paint. This is to make sure there will be no rough spots when the paint job is done. The repairs can be done with marine epoxy.
  • Sand the boats entire surface down thoroughly with some 80-grit sandpaper, a random-orbit sander, or a finishing sander. This will ensure the paint covers the surface evenly and will help the Marine epoxy paints grip to the surface.

Taking care of your Epoxy Boats

To apply marine grade epoxy, you can use a brush or roller. But in order to do it correctly, the mixing method involves doing one pump of the resin followed by one pump of the hardener. This will ensure the epoxy produces a durable and strong cure, and you will not have to sand anything before each coat. However, you can sand immediately once the required coats have been applied for a more finished look. After this your surface will require little maintenance.

Depending on the type of material, you can choose the best epoxy resin for the job. This can be repairs or maintenance for your car, boat, or a variety of other materials.  Marine grade epoxy will cure hard yet remain flexible enough to provide protection from salt water, fuel oils, mild acids and gasoline.

Marine grade epoxy is also manufactured to be durable and provide the utmost in protection on any surface, especially those that are exposed to harsh environments. Whatever project you are busy with, be it coating timber for boats, or simple plywood, you should apply at least two coats. You can easily do this with a paint roller or brush, which should coat the wood completely and will guarantee a durable surface or item.

Also, the coated surface should remain securely fastened and it should be watertight against any moisture. So, since it preserves the wood even better than primer or paint, the wood should be protected and last a long time.

Questions and Answers

What marine epoxy brand is the most popular?

Getting your money’s worth is important, so you want to choose a brand that has quality products. You need to look for brands that also offer durability and reliability for their marine grade epoxy products.

Some of the more popular brands include:

  • Loctite
  • Old Timer Industries LLC
  • J-B Weld
  • TotalBoat

Where can you buy marine epoxy?

You should be able to easily find marine epoxy at your local marine supply shop. Otherwise, there is always buying online, where there are plenty of product options.

Pros and cons of shopping at your local marine supply store:

Pros

  • Shopping at your local store gives you the opportunity to look and handle products
  • Locally trusted and well-known company

Cons

  • May not be well stocked
  • Products may be limited

Pros and cons of shopping online:

Pros

  • A vast selection of marine epoxy products to choose from.
  • Offers more specials and discounts.

Cons

  • May encounter fraudulent online shops, so make sure to only do transactions with legitimate sites

Obviously, both options have their pros and cons, so it is really up to you which one you prefer.

]]>
https://www.epoxychina.com/?feed=rss2&p=74 0 74
Epoxy Paint for Wood Floor https://www.epoxychina.com/?portfolio=iphone-showcase https://www.epoxychina.com/?portfolio=iphone-showcase#respond Mon, 02 Jan 2017 10:06:36 +0000 https://demo.themegrill.com/flash-default-2/?post_type=portfolio&p=72 If you are looking for the perfect wood coating that aims to show off the grains of the wood along with a durable finish, then using the best epoxy paint for wood is a no-brainer. However, there are many varieties of epoxy paint and there are particular steps that you will need to take before you can start applying this paint. This includes proper preparation of the surface along with choosing the right paint for the job.

What is Epoxy Paint?

Epoxy paint is a coating that is available in two variations, acrylic, and oil-based, both of which have proven to be extremely durable and chemically resistant. Epoxy paint has also proven to be extremely effective for outdoor use due to how well it can withstand all types of weather and various temperatures.


Oil-Based Epoxy Paint

Oil-based epoxy paint is perfect for coatings smooth and porous surfaces such as plastic, wood, sheet metal, and metal. One of the biggest advantages of using this type of paint is due to it being able to provide you with an even surface that is significantly easier to sand than an absorbent material. This is what makes it a prime choice for painting wood flooring over textured and rough surfaces. This includes hardwood and tile floors.

When it comes to coating surfaces in oil-based epoxy paint, tile over concrete and hardwoods are generally coated with this paint. This is what makes it so popular for commercial and residential uses. Epoxy paint can also be used on roofs and floors to assist in repelling insects that are known to cause damage to the material. Due to the water-based formula that is used in the manufacturing process, oil-based paint does not create any type of vapor when it comes into contact with the surface of the material. This is what makes it an ideal choice when for indoor applications such as factories and a range of enclosed areas.

This is the best epoxy paint for wood as it does not erode over time and this is due to the lack of chemical content that is used in the manufacturing process. This makes it impossible for porous wood to absorb the paint and this essentially makes it a natural repellant to wood floors.


Acrylic-based Epoxy Paint

If your main focus is an aesthetically pleasing finish, then you will likely lean toward acrylic-based epoxy paint. However, despite the smooth finish that can easily be attained with this type of paint, the smooth and absorbent surface of the paint makes it easy for dirt and dust to penetrate it. Acrylic paint is also significantly more prone to staining, which is not what anyone would want. Another disadvantage is that this type of epoxy coating for wood floors is extremely difficult to apply to surfaces that are uneven and it could cause bubbling.

The high amount of gloss in the paint makes it a poor choice for rough surfaces such as wooden floors and tiles. This is not recommended for beginners as it requires high expertise to remove the topcoat of paint. Both acrylic and oil-based wood floor epoxy paints are suited for the surface; however, each one will present a set of pros and cons.

The Best Epoxy Paint for Wood

If you are looking for high-quality epoxy paint for wood floors or wood in general, then the options that we have listed below will provide you with an excellent and durable finish. However, this should be done with the correct technique, as the materials that you use will only be as good as the applicant.


The Best All-Round Epoxy Paint for Wood: RUST-OLEUM Marine Topside Paint

Rust-Oleum Marine Topside Paint is the ideal choice for wood and a range of other surfaces such as metal and fiberglass. This is a flexible epoxy for wood floors and is very easy to apply with great leveling. This oil-based epoxy paint is excellent for sleek surfaces that come into regular contact with moisture, which makes it a great epoxy coating for wood floors. Finding a good wood floor epoxy that is quick-drying and hardens with a glossy and durable finish is not easy to come by, and this is also a perfect epoxy over wood coating as it dries within two hours.

However, this is not a product that appeals to novice DIY warriors due to its relatively high price range. Furthermore, despite how easy it is to apply as a flexible epoxy for wood floors, it has to be applied in thin layers. This is because this is an epoxy paint for wood floors that will bubble if it is applied too thick. Overall, this is one of the best epoxy over wood coatings that money can buy.

The Best Epoxy Primer: RUST-OLEUM Maximum Adhesion Primer

While it is technically not an epoxy wood floor paint, epoxy primer is one of the most important products to purchase and it is a necessary part of the painting process. This is because epoxy paint cannot adhere to a bare wooden surface or floor and the priming process will allow this to happen. Using an acrylic latex primer allows you to get the desired finish and it must be applied before adding a coat of paint. Epoxy primers are also available in a variety of colors, which is important as you will need to choose the one that complements the color of the wood that you are going to paint.

The Rust-Oleum Maximum Adhesion Primer is one of the best water-based primers and this high-quality product will enhance the adhesion between the paint and the wooden surface. This primer also allows for the paint to adhere to a variety of surfaces in wet and warm environments.


The Best Epoxy Additive: RUST-OLEUM Marine Anti-Slip Additive

One of the biggest concerns when using epoxy paint on a floor is whether it would become slippery. While it might not be as slippery as it looks, this can quickly change when it is exposed to water. To ensure that no one hurts themselves when trying to make their way across the floor, adding a non-slip additive will stop this from happening especially when it comes to an oil-based epoxy wood floor. While most epoxy paint for wood floors is water-based, there are oil-based epoxy wood floors that require a non-slip additive.

The Pros of Epoxy Floors

Like any finishing, there are particular advantages and disadvantages when it comes to epoxy wood floors. Below you will find a variety of factors that you will need to consider before you decide to cover your wooden floor with an epoxy coating. Weigh the pros and cons and decide whether it is worth it.

Below you will find all of the benefits of installing an epoxy coat on your wood floor, but this can also be applied to a variety of materials, which depends on the type of paint that you are using. Also, the finish will depend on the experience of the person that is applying it.


Appearance

One of the most appealing factors of epoxy floors is the appearance. A coat of epoxy paint can create a professional and bright look, especially when the finish is smooth. Furthermore, it is very easy to maintain, as there is no need to polish it, as regular sweeping will do the job.


Cost

When you compare the cost per square foot of epoxy floors to others, it is very difficult to beat. This is due to it being installed over wood and other materials. The cost alone should be enough to entice you to make it your next DIY project.


Resistance

The great thing about epoxy floors is that it is pretty much resistant to everything. This includes strong chemicals such as brake and transmission fluid, gasoline, oil, bleach, and so on. This is why they are generally used on garage floors at home and in the automotive business.

Durability

When it comes to durability, epoxy floors are an excellent choice as it is incredibly strong. The only material that is more durable is concrete, which does not look as good. There are additional steps that you can take to improve the finish of your floor, but this is seldom necessary.


Protection

Epoxy floors will protect whatever is beneath them from stains, cracks, moisture, grease, and more. This means that you will spend less on cleaning and general maintenance. However, there is a catch, as this will only apply to how well it has been installed, so do not try and cheap out on the installation process as it will come around and bite you.


Longevity

This is a long-lasting flooring solution especially if it was installed correctly. Epoxy flooring can go decades without needing to be replaced, and this means that you will rarely see any peeling or cracking. Due to its long lifespan, it is very popular for industrial use.


Variety

Epoxy floors are generally very beautiful as it allows you to get creative. Here you will be able to use a variety of colors and patterns to get that elegant or bright finish that you desire. The floor will be able to change the entire look of a home or office space, along with the general ambiance.


The Cons of Epoxy Floors

Like any type of paint, there are a few downsides to using it; however, most of these are due to incorrect application or if it is a product of subpar quality. This has the potential to negate any of the benefits that this finish might bring.

Temporary

When it comes to using epoxy, there is one major disadvantage, and that is that it is not a permanent flooring solution. Despite its durability and high resistance to chemicals and other elements, it will require replacing after a while. Wear and tear will diminish the floor and it will no longer have the same glossy appearance it once did.


Slippery

Oil-based epoxy floors are known to become extremely slippery when it is wet, and it can be a very dangerous situation. This is especially bad in areas that are prone to wet floors such as bathrooms and kitchens, and the only way to manage this is to texturize the surface.


Preparation

Preparing a surface for epoxy paint is incredibly tedious and requires a lot of effort. The surface of the wood or concrete has to be completely clean and free of any solvents, oil, or grease. However, there have been plenty of advancements that have been made regarding the materials and it has become easier over time.


Application

Epoxy paint takes a very long time to dry, and this could mean that the area that you are painting might be inaccessible for a few days. The first coat has to be completely dry before you will be able to add another layer, so expect to spend a week doing this.

Smell

Epoxy paint does have a pungent smell due to the large volume of fumes that comes with using wet epoxy. The strong smell of ammonia is more prevalent in darker shades of epoxy due to them having more hardeners, so keep this in mind if you are choosing a darker color.


Removal

Applying epoxy can be incredibly expensive as it is a labor-intensive project, and one of the worst parts of using this material is trying to remove it to repair the floor. This is something that you should not attempt on your own as it can be very easy to make a critical error.

How to Apply Epoxy Paint to Wood

The process of applying epoxy paint to wood can be split into three parts and it is important that you do not skip or attempt to take any shortcuts, as you will likely need to redo it. Below you will find the entire process along with a few tips to make it a bit easier.


Part 1 – Positioning and Sanding the Wood

Step 1 – Any uneven piece of wood that you are planning to use must be sanded with sandpaper with a grit between 120 and 220. A smooth and even surface is required for the epoxy to be applied without any issues. A good tip is to sand with the grain to achieve a smooth surface.

Step 2 – The next step might seem tedious, but it is vital to ensure that the wood is completely clean. Using a microfiber cloth yield the best results, especially if it is damp, as this will get rid of all of the dust. To make the process easier, you can also use a brush or a small vacuum to remove any excess dust.

Step 3 – To ensure that you have a handle on the epoxy drips, attach the painter’s tape to the back of the wood. You should then place it on a flat surface and ensure that the surface is flush with the workbench to ensure that no epoxy leaks beneath it. Remember, the tape only needs to be applied to the edges of the wood.

Step 4 – Protect your work surface with plastic or cardboard to ensure that you do not get any epoxy spillage on the table. Epoxy can ruin a table and this is the last thing you need. The best thing to use is a combination of plastic and cardboard.

Step 5 – Elevate the wood with empty cans or old cups to ensure that the wood does not touch the surface. The wood that you are working on should be elevated with the side that you are planning to coat facing towards the ceiling.

Part 2 – Joining the Epoxy

Step 1 – Join the epoxy in a dust-free and well-ventilated room as the epoxy has a very strong smell that could cause very bad headaches. You should also prevent mixing the epoxy in a room that is below 65 °F, as this could result in a poor mixture.

Step 2 – The hardener and resin should be measured into two disposable containers as both will need to be mixed in a different ratio of hardener to resin. It is best to use a plastic container or cup as the indentations make it much easier to measure.

Step 3 – Combine the hardener and the resin once the two have been measured correctly. A piece of wood will work well to get the hardener or resin off the sides of the container. It does not matter if you pour the hardener into the resin or vice versa, just do whatever is easiest.

Step 4 – Stir the mixture for five minutes very slowly with a clean stick or piece of plastic. Stirring too quickly will create bubbles. If you are starting to see bubbles, do not panic, these can be removed at a later stage with heat.

Part 3 – Coating the Wood

Step 1 – Pour the epoxy mixture on the center of the wood and start to coat the surface with a thin layer. It does not have to be perfect, but you will need to work quickly as it will start to harden as soon as it comes into contact with the surface.

Step 2 – With a foam brush spread the epoxy to the edges of the wooden surface. This is a simple process and all you need to do is ensure that the layer is even and that the edges have been wiped down with the sides of the brush.

Step 3 – If you have any air bubbles, which you likely will use a heat gun to get rid of them. If you do not own a heat gun, a normal hairdryer will be just as useful. Keep the heat source around 10 inches away from the surface to ensure that the bubbles are removed. However, if you keep the heat gun/hairdryer in one spot, it will burn the epoxy, so keep it moving.

Step 4 – The first coat will need around four hours to harden and dry; however, it will feel a bit tacky and this is a good time to add another coat of epoxy. Remember to pay attention to the bubbles as you will see them within 30 minutes after spreading.

Step 5 – Another coat of epoxy should be added for an added layer of protection, and this will have you repeat the mixing process as you did before. Remember to ensure that the next layer is even and you should use a harder surface to spread the next layer, as the foam brush will not produce the results that you would want.

Step 6 – Allow the epoxy to dry for 24 hours and then you can remove the tape that was applied to the back of the wood. However, it is best to wait up to 36 hours just to be safe, as you could ruin the finish if you choose to touch the surface.

Frequently Asked Questions


Will Epoxy Soak into the Surface of the Wood?

Yes, this is why it is important to prime the wood with an epoxy primer, as the wood will be damaged and will likely crack because of the epoxy that has soaked into it.


How do I Clean Off Wet Epoxy?

Wet epoxy can be cleaned off a surface with rubbing alcohol, but this will not work once it hardens.


Which Brush Should I use to Smear Epoxy?

Do not use a normal paintbrush, a foam brush is recommended for the first coat, and a harder tool such as a spatula should be used for the last few coats.


Is There a Specific Number of Coats that I need to Apply?

Two to four coats are usually needed, but you can apply as many as you think are necessary.


How do I Achieve a Clear Finish After Applying Epoxy?

Using a range of different sandpaper grits from 100 up to 1200 will produce finer scratches that can be polished once it is completed.

]]>
https://www.epoxychina.com/?feed=rss2&p=72 0 72
Garage Floor Epoxy https://www.epoxychina.com/?portfolio=vintage-watch https://www.epoxychina.com/?portfolio=vintage-watch#respond Mon, 02 Jan 2017 10:06:04 +0000 https://demo.themegrill.com/flash-default-2/?post_type=portfolio&p=70 Using garage floor epoxy coating has numerous advantages. It offers a high durability floor finish for a busy garage space. The best garage floor epoxy provides resistance to frequent use, chemicals, oil spills, scratches, and any marks or deposits left from hot tires. Epoxy-coated flooring is simple to clean, looks impressive, and is also low maintenance! If you are keen on giving your garage a facelift, your ideal solution may be a garage floor epoxy kit. Together we’ll take a look at the various garage floor epoxy coating options available and get some ideas of how to use this effective flooring solution.

Understanding Garage Floor Epoxy

Epoxy resin is a multipurpose coating, well suited in a variety of different areas. Applying epoxy as your garage floor coating is a simple enough project you might try at home. Garage floor epoxy paints offer practicality and long-lasting durability. There are a few kinds of floor epoxy available. You will have to decide between garage floor epoxy paints and garage floor epoxy coating. Either will provide specific properties and finish varieties. Keep following as we will cover both of these.

Garage Floor Epoxy Coating

For a clear epoxy finish, you might select a commonly found garage floor epoxy kit. This contains the two additives you need to combine to produce the transparent, durable epoxy solution. The even epoxy finish produced offers strength and it will be easy to maintain. You can find a number of epoxy products on the market. When you select one, ensure it is a specialized garage floor epoxy kit. This has been formulated to withstand the frequency and degree of contact you might find in a garage. The epoxy offers good adhesive qualities, bonding effectively to most surface types, and allows direct application over painted surfaces or concrete. Although applying this type of epoxy may take slightly longer, it provides a stronger transparent finish with great longevity.

Garage Floor Epoxy Paints

Using garage floor epoxy paints is also a well-favored choice for the application of floor coatings. These specialized epoxy coating solutions offer protection against any wear and tear in high-frequency traffic areas. This is a specific kind of acrylic-based latex paint, strengthened with epoxy. It does not require mixing or any additional pre-application measures. Once you apply the paint to the surface, it is enhanced by the high durability properties of the epoxy.

The application of garage floor epoxy paints is simple, and they provide a thin color coating. The finish appears as shiny colored paint, as opposed to transparent epoxy resin coatings. The best epoxy for garage floor is formulated specifically to withstand chemical spills, hot car tires, water, scratches, oil, and contact with heavy objects. This may be a stronger solution than plain old household paint, but it doesn’t offer the level of durability of dual-component epoxy.

It is also possible to combine the use of clear epoxy coating and epoxy paint to create an excellent, high durability garage floor coating.

Advantages of Using the Quality Garage Floor Epoxy

Why is epoxy well suited for garage flooring? It is advantageous in this area for many reasons, making it a widely used solution. Let’s take a look at some of the qualities provided by the best garage floor epoxy products:

  • Epoxy is resistant to oils, chemicals, and water
  • Epoxy flooring offers high durability
  • Avoids any buildup or deposits left by hot car tires
  • Epoxy coating offers scratch and impact resistance
  • Garage epoxy flooring offers very simple cleaning with little maintenance required
  • Epoxy coating provides a sleek, gloss surface with incredible longevity
  • The application of an epoxy garage floor kit is simple enough to apply yourself
  • Epoxy flooring is a far more cost-effective solution compared to most flooring types
  • Epoxy floor kits provide protection for concrete beneath from water damage
  • Epoxy flooring can be applied directly on painted surfaces and allows color and dye to be added during the process, as well as anti-slipping agents
  • Epoxy coating offers great adhesive properties with most surface types

The Best Garage Floor Epoxy

Now that we understand the benefits of epoxy garage coatings, we can help you select the specific product for your needs. There is a range of epoxy resin types on the market and they all have specific qualities to suit the purpose for which they are designed. Achieving a lasting finish will require that you select the best garage floor epoxy for the job. We have demystified this process by preselecting some of the best garage floor epoxy solutions for various purposes.

The Best Epoxy Garage Floor Kit: EpoxyShield from RUST-OLEUM

This comprehensive garage epoxy kit from Rust-Oleum provides all the necessary ingredients to reface your garage floor. This is a solution aimed specifically at the home DIY enthusiast. With a relatively straightforward application procedure, it produces an excellent quality finish. EpoxyShield is up to 5 times stronger than epoxy paint, so it definitely provides a lasting durability solution.

This dual-component product is well suited for a multitude of different rooms and spaces. It offers an attractive gloss finish that allows easy cleaning. The coated surface will prevent the buildup from hot car tires and protect the floor from oil, antifreeze, gasoline, and salt. Once the application is completed, the surface will require at least 24 hours before you can walk over it and roughly 72 hours before you can drive on it.

Its formula contains low levels of VOCs and produces very little odor, making it suitable for interior situations. This high gloss finish will update the look of your garage, creating a space you can be proud of.

The Best Decorative Garage Floor Coating: DecoEffects by SUPERCOAT

This epoxy garage floor kit from the reputable brand Supercoat contains the coating layer, an anti-slipping agent, a urethane glaze, and the colored reflective flakes. When you have finished applying each of these in their respective steps, the result will be an attractive, lasting durability floor coating that offers easy maintenance. This industrial quality garage epoxy floor kit will cover an approximate area of 400-500 square feet (121-152m₂). The distinctive colorful chips and a shiny coating are distributed carefully into the fluid epoxy mixture. Once the coating has completely set and dried, it produces a dynamic effect that can transform the look of your garage space.

This is a water-based coating, contains low VOCs, and produces low levels of odor when applied. The resulting flooring is simple to clean, and safer for interior areas. The inclusion of the anti-slip agent reduces the level of risk considerably when the floor is wet. This garage epoxy kit offers versatility for use in your garage at home, or even in a retail showroom or warehouse setting.

Best Value: RUST-OLEUM EpoxyShield Professional Based Floor Coating Kit

This solvent-based garage epoxy floor kit uses a formula high in solids. Although it is higher toxicity than water-based epoxy solutions, it produces a better durability result. Epoxy floor kits of this nature offer increased longevity, which is ideal for garage floor surfaces, workshops, or basements. When the finish has set and dried completely it is chemically resistant and provides protection from water, as well as heavy wear and tear.

This industrial garage floor coating provides approximately 200 square feet of area coverage per gallon (60m₂ per 3.7l). This high durability solution is specially purposed for contact with motor vehicles and prevents the formation of pick-up from hot tires. This industrial quality product has an attractive semi-gloss surface, which also allows the addition of color flakes to the finish. All in all, an outstanding home improvement solution.

Best Garage Floor Gloss Coating: RUST-OLEUM Clear Gloss Coating

DIY enthusiasts are sometimes put off by the idea of using dual-component epoxy floor kits. In this instance, we suggest you use Rust-Oleum clear gloss epoxy coating. This leading acrylic-based formula allows application directly on painted floors, epoxy, and concrete. Once the coating has cured completely, the high-gloss finish it produces is chemically resistant. The surface allows the use of motor vehicles and offers great longevity. This multi-purpose coating offers a simple application process, allowing you to paint it over a variety of different interior and exterior surfaces. After applying it, the result is an impressive finish with great protective resistance which is well suited as garage flooring.

How to Choose the Best Garage Floor Epoxy

With such diversity in the range of available products, finding the best epoxy for garage floor can be a challenge. Your selection will be affected by the following factors which we cover in detail next.

Cost

One of the initial considerations when renovating your home is the cost involved. What are the project’s total costs? Which product is the most cost-effective? When selecting the best garage floor epoxy, the price generally determines the quality. To spend a slightly larger amount on a higher-end garage epoxy kit may result in long-term money-saving, due to the longevity and durability of the finish and low maintenance requirements.

Floor paint is a more affordable option. These paints are straightforward to apply, without the added expense of epoxy-based products. The disadvantage is they offer far less durability and will need replication before long. Over time the finish may gradually chip, crack, scuff or flake away. So the better, more high-end epoxy solutions are worth paying for.


The Finish

The best garage floor epoxy products require more than durability alone, the appearance must be impressive as well! The various types of epoxy each produce a specific finish. Epoxy floor kits mostly use a gloss layer to finish the coating. This produces the shiny appearance which is so popular. Epoxy is usually transparent, so it can be applied directly upon a concrete or previously painted surface, while it also allows the adding of color flakes to accomplish different designs. If you do not desire a gloss coating, there are a few additional types like semi-gloss.

Not everyone prefers the glossy appearance of epoxy flooring, so using floor paint will be a better choice in this instance. Flooring paint has some additional sheen as well as flat color varieties available. These offer a more even, lower gloss finish.

Durability

The question of how durable the finish is once applied is an important one to consider with floor coatings. Using garage floor paint will not produce a finish with the same level of longevity, and will most likely require reapplication after two years. The paint is prone to cracking, peeling, scuffing and chipping, and offers less abrasion, chemical, and water resistance.

The best garage floor epoxy will offer a lasting durability solution. Garage floor epoxy coating is exceptionally tough and heavy and provides a decent level of protection from chemicals, water, impacts, and scratches. How durable these products are varies with different types of epoxy. A quality garage floor epoxy coating will protect the surface from the build-up and residue left by hot tires, and its heat-resistant capability should also be a factor to consider.


Traction

The drawback of using epoxy flooring is how slippery the surface can become when it is wet. Epoxy provides a smooth, even finish which is widely appreciated, but others would like a floor surface that offers more safety. The various epoxy garage floor kit types provide differing degrees of traction properties. Some are formulated with ingredients that offer anti-slip characteristics and make the floor surface more textured and safer as a result. Other variants provide a totally even, gloss finish, so decide which will best suit your particular needs.


Cleaning and Maintenance

It may be tiresome to think that anyone would need to repeatedly clean their garage. This is why the simplicity of cleaning and maintenance is such an essential part of epoxy flooring. These epoxy coating types are usually easy to maintain. The surface generally avoids marking, and liquid spills require only to be wiped easily away. Although it varies with the product you choose, epoxy coating offers incredible longevity, so you won’t need to reapply the surface.

Painted garage floor surfaces are not quite as simple to maintain. The risk of scuffing or marks on the surface is an increased factor, and they will also need repeated application to maintain the appearance.


UV Protection

The UV protective qualities of any epoxy resin-based product will always be a factor worth considering. Garage floors are mostly interior surfaces, so this may not be as high a priority, but UV damage can also occur from exposure through doors, windows, or skylights. Without UV protection, the finish may begin yellowing or show discoloration in time. For a transparent, high gloss epoxy finish that provides lasting durability, ensure the product you choose offers sufficient UV protection.

Application

The application method is a crucial part of the process. The procedure of using a garage epoxy floor kit can take some time. The flooring surface will need to be prepared before you begin applying each epoxy coat, which can also take a while to dry completely. To prepare the surface you might carry out concrete repairs or etching, and it will need to be well cleaned and perhaps even primed. Before purchasing your flooring kit, ensure you are familiar with the procedure so you can make the necessary preparations.

The application also involves combining the epoxy mixture. Quality epoxy floor kits have simple mixing procedures, requiring basic mix ratios. If this seems too involved or tedious a process, perhaps you should rather opt for a single-component epoxy solution.

Water-Based or Solvent-Based Epoxy

When you decide on which floor epoxy solution is best suited for the task, this means choosing from either a water or solvent-based type of product. Each has characteristic benefits which may suit certain situations. Water-based epoxy formulas are usually favored as they are environmentally friendly. This product type is generally low odor, low VOC, and requires no chemical agents for the cleaning process. While they may be preferred for their ease of application, the disadvantage is the lower level of durability.

Solvent-based formulas produce a more durable and resistant solution, usually with greater surface adhesion quality and overall longevity. They do however produce toxic fumes during application and have greater safety requirements. The drying times are also longer.

How to Apply the Best Garage Floor Epoxy

As you are now more familiar with the products that will best suit your purpose, you can go about applying epoxy at home. Although this may be a lengthy procedure, it is certainly worthwhile. Be careful that you follow the steps accurately, so you will get the best resulting finish.

Surface Preparation

Let’s proceed with the assumption that your floor surface is concrete. One of the critical factors affecting the resultant quality of epoxy flooring is the surface preparation. Your initial task is to ensure the concrete surface is even and free of holes or cracks. Should you discover any on closer inspection, these can be repaired using an epoxy concrete filler product. The surface will now require thorough cleaning. It is recommended to use a high-pressure hose and spray nozzle for this. Remember to leave no traces of dust, dirt, or grease. For optimal adhesion of the epoxy, the surface needs to be totally dry and clean.

Profiling the Floor

Next, the floor surface requires profiling. This involves dissolving the outermost layer of the floor, so the epoxy can bond optimally with the porous concrete and produce a durable surface. You can use an acid etching solution for this purpose, which is brushed and then scrubbed over the surface of the concrete.

You can also grind down the surface to expose the pores beneath, however this is a far more involved process. The surface will require the same level of cleaning once the profiling is completed, so use a vacuum for any dust and debris and rinse the surface completely.

Protecting the Area

Once it has set and cured, cleaning up or removing epoxy from a surface can be highly problematic. Therefore, take the necessary precautions to ensure your workspace is adequately protected. Prevent any epoxy spills by covering any furniture, walls, or fittings with plastic sheeting and masking tape.

Mixing the Epoxy

The floor is now prepared for applying the epoxy. Begin by gathering up your necessary tools and materials. You need to ensure that your equipment is readily available, as once you start mixing the epoxy, you will have limited time to work before the mixture hardens. Once you are sufficiently prepared, you can combine the epoxy components according to the product guidelines supplied. For effective results, this needs to be mixed thoroughly. At this point, color additives such as dyes and flakes can also be mixed in.

Applying the Epoxy

Now you can begin with the initial epoxy coating application. You can apply this with a specialized epoxy roller brush. Begin the application at the back end of the garage and move in the direction of the door. The best epoxy for garage floor has a self-leveling formula, making the application easier. Be sure to spread the epoxy evenly, keeping in mind that the coating must dry completely.

The length of the drying process will be affected by the surrounding environment and the properties of the specific product you are using. Once the coating has dried completely, you may apply additional layers by simply repeating the same procedure.

Applying a Top Coat

When you have completed the epoxy application and it has set properly, you can then apply a topcoat finish which can be polyurethane, epoxy, or polyurea. This high durability transparent coating provides a finish that lasts. Once you have smoothly applied the topcoat, you will need to allow 72 hours for it to totally cure.

FAQs


What Longevity do Epoxy Garage Floors Offer?

This is dependent on the type of product used and the characteristics of the environment, usually however epoxy flooring lasts roughly 5 to 10 years.

How Easy is the Application Procedure?

Applying epoxy garage floor coating is straightforward and relatively hassle-free. Although, the procedure may be quite long and require following a few steps. The simplicity of application and cost-effectiveness makes it a highly competitive option.

Do Epoxy Floors Crack?

Epoxy flooring offers lasting durability, with the ability to withstand constant abrasive contact. Over time you may encounter cracks in the finish when using certain epoxy products, due to the lack of flexibility. So to be safe, ensure you select the best garage floor epoxy available to you.


Choosing the best garage floor epoxy provides numerous advantages when maintaining your house. We trust that this guide will give you the courage to take on your own projects, as you will definitely enjoy the accomplishment of transforming your floor with a highly durable and impressive-looking finish. We wish you only success with your next DIY project!


]]>
https://www.epoxychina.com/?feed=rss2&p=70 0 70
3D Flooring https://www.epoxychina.com/?portfolio=story-book https://www.epoxychina.com/?portfolio=story-book#respond Mon, 02 Jan 2017 10:05:28 +0000 https://demo.themegrill.com/flash-default-2/?post_type=portfolio&p=66 Are you looking to redecorate or want to create something special in your new home or business? When it comes to floors, consider the amazing 3D flooring. The beautiful 3D flooring designs will add a unique touch to your living or workspace. Following is a guide on how to make 3D floor art yourself and discover how to properly install 3D epoxy flooring.

What is 3D Flooring?

3-d floors provide amazing images, all of which are 3-dimensional. The pictures are then coated in epoxy resin. When choosing your image, make sure it is high resolution, you do not want it to be blurred and ruin the effect. Choosing the correct size image is also important, once the 3D epoxy flooring is complete, it should provide a realistic final image.

The 3D flooring designs are completely up to you, almost any image should work on the floor. The main thing to consider and have correct is the angle as well as the resolution of the image. If you do get a professional in, you can choose the images they provide. Some companies only do their own images, while others also allow you to choose your own. Of course, when doing DIY epoxy floors, you get to choose your own designs and images.

Advantages and Disadvantages of 3-D Floors

3D floors, when completed, can create an almost immersive setting. Besides the atmosphere, 3D graphics flooring has quite a few more advantages. Below are a few benefits and disadvantages to 3D floors.

As you can see, there are more pros to 3D flooring, as it does create a unique and durable floor that everyone will admire. However, installing the 3D floors should be well-thought-out before attempting. Also, if you are not sure about the 3D flooring designs, and creating your own images, you do get ready-made 3D floor stickers. The stickers are easy to use and less expensive.

If you do have some practice with epoxy resin and enjoy doing other crafts, then you might find 3D floors challenging but doable. Below are a few important steps for installing your 3D epoxy flooring.


3D Flooring Materials

To make your own diy epoxy floors, you will need the following supplies:

  • Your flooring design or image
  • Plastic Roller to evenly apply the resin
  • Squeegee to flatten the 3D flooring designs
  • Self-leveling primer
  • Cleaning tools to get rid of any dirt on the floor

If you generate your own image, you will also need the proper image program. Using a program like photoshop should provide the best design. There are two options for your floor designs:

Option 1: Printing your own Image

You can have your individual image printed in a print shop which is specialized in large formats. But printing and creating your own image can be costly.


Option 2: Buying ready-made Floor Stickers

Fortunately there is the cheaper option to buy already made 3D stickers. There are many options available, such as these:

Sealing 3D Flooring with Polyurethane Resin

Sealing your 3D flooring designs can be done in one of two ways, with PU Resin or Epoxy Resin. They both consist of a two-part system, which must be blended using precise measurements. These two options offer the same in durability and can be used on multiple surfaces. Both the above resins can also be enhanced by adding certain filling substances. For example, an inhibitor can be included to prolong the pot life. You can also include color pigments or even glitter to create more of an effect. Although, for 3D floors, you will want more of a clear resin coating. The PU resin option does provide UV resistance, while the epoxy resin is not an appropriate choice for using outside. You should also be aware of any direct sunlight when using epoxy resin inside, as it will yellow over time. PU, on the other hand, does not have this problem and it will maintain the color brightness of the 3D flooring designs.

Tutorial to 3D and DIY Epoxy Floors

To create the perfect 3d floors, you will need to make sure you have all the proper tools, enough time and, of course, patience to finish the job correctly. Next, you can read through a few steps needed for creating your very own 3D graphics flooring


Choosing an Image

The 3D flooring designs can either make your floor or ruin it. So, be prudent and ensure it is high resolution. When deciding on a floor design, make sure to consider the entire room and how you want it to look. Everything should be planned and work together, from the floor image to the walls, furniture, curtains, and any other items in the room.


3D Flooring Designs and Perspective

When creating your own image, it is important to have an editing program like photoshop. Take some photos of the space going to be used for the 3D flooring. Once you have chosen your image or photo, you can then use the photo editing tools to superimpose your image onto the photos of the room. You might have to change the size a little to fit the room properly. In photoshop, the perspective distortion function will help with this.

This will help to create the correct perspective and you can also adjust everything until you are happy with it. You can then see if the image will fit and if it goes with all the other design ideas you have for the room. Choosing and creating a proper 3D image is important because if once everything is done, it is extremely difficult to remove or change. The image you choose should be one you are happy with and that you do not mind looking at for the next few years.

Also, try and select an image that is appealing to most adults and children. For example, maybe rethink something like a scary image of a shark with its mouth open baring its sharp teeth.


Print your 3D Flooring Designs

Save your prepared image onto a USB drive and head off to a printing shop that offers large format printing. Ask their advice and first print out a smaller image as a sample. Next, print out a larger image XXL format. Make sure the ink used is of excellent quality and has UV-resistant qualities. The alternative to printing an image, as we have mentioned, is purchasing special floor stickers.

Priming the Substrate

Before you begin with your 3-d floors, the surface of the floor must be thoroughly clean and free from dirt, dust, and any grease marks. Another important factor when doing 3-d floors is that the floor must be flat. If it is uneven, the final result of the 3D image will be affected. If there are any floor fractures, these need be sealed with putty. Allow this to dry thoroughly and then clean the surface, preferably using a vacuum cleaner. The edges of the floor should be sealed, making it waterproof. To seal, you can use insulation strips. Sometimes, the surface has to be roughened to provide better adhesion for the primer, but this will depend on the type of floor or substrate. Again, the substrate must be completely dry so the adhesive can adhere correctly when applied. Once you have cleaned and allowed the surface to dry, you can then apply the self-leveling epoxy primer. This will create an ideal even surface. Allow this to dry completely.

Apply 3D Flooring Designs or Images

When sticking your image onto the floor, you either use a two-part epoxy resin adhesive or an excellent quality glue. Apply the adhesive onto the floor surface using a toothed spatula. Then you can take your printed image and lay it out onto the floor using a rubber pressure roller. To do everything, should take more or less 45 minutes to an hour. If you have used a resin adhesive, make sure you take note of the pot life or working time. Once the print is down, remove any bubbles or wrinkles using the squeegee. Use even strokes with the squeegee beginning in the center of the image and move outwards.

Sealing the 3D Graphics Flooring with PU Resin

Once the image is down and the surface is even without any wrinkles, you can begin to blend the resin. Combine your resin and hardener in equal proportions or as specified by the manufacturer. Follow the instructions precisely, as the resin will not cure properly if you do not adhere to the correct ratios. Too much hardener and the floor becomes porous, too little and the resin might not harden properly. Make sure to blend the two components thoroughly. Once you begin, the pot life is around 30 minutes to 45 minutes. The resin will begin to harden after this time, so be aware of your processing time. Using a roller, apply the resin mixture to the floor evenly. Go over the resin with the roller several times to help prevent any bubbles. Once the whole floor is covered, the resin should be left to cure. Curing time is about 24 hours but can vary according to the product, temperature, and airflow. After the 24 hours apply another resin coat, this will help to improve the surface durability. Leave another 24 hours to harden.

When working with resin you need to take safety precautions into account. Make sure to use protective eyewear, gloves, clothes and a respiratory mask. The space you are working in should also be well ventilated.  You can add a second and final sealant coat, which will improve scratch resistance. Leave the floor to fully cure for about one week, after which, you can move furniture onto the surface.

Metallic 3D Floors

We have just discussed the application of printed 3D images onto the floor, but there are also other effects you can create. Metallic 3D floors are just as eye-catching, the colors can be customized to fit your needs. You will have a beautifully smooth and glossy floor, providing a unique and innovative look. The metallic 3D floors also provide durability and can resist both chemical and heavy loads. The finished floor will have no joints and is continuous, so cleaning is easy.

Maintaining your 3D Floors

The 3D flooring is simple to maintain and keep clean, any messes can easily be cleaned up. Preferably use specialized PU cleaning products, which will give you a more thorough clean especially with tough dirt. But you can also use other cleaners. When cleaning use a scratch-free pad and a lint-free cloth. When more evident scratches appear, you can then reseal the surface with another PU resin layer. Before you do this, the surface should be clean and completely dry.

Questions and Answers


Where can I Get 3D Flooring Designs?

Today, the digital world is easy to access and 3D images should be quite simple to find or even make yourself. First, you can create your own images from photos you have taken, or you can choose an image online. If you do select an online image, make sure to check licensing and usage agreements. Online image sites do have free options, but other images require a once-off fee, or you might need to subscribe to get access. Some companies specialize in 3D floors and can provide you with print outs for your floor.

What Depth can go to for 3D Floors?

The minimum depth of 3D floors is 1.5 mm. This includes the thickness of your printout and the layer of resin.


How long does 3D Graphics Flooring Last?

If the 3D floor is properly maintained, which is easy to do, it could last for years. Generally, you can expect the 3D epoxy flooring to last for 10 to 15 years. The time mainly depends on how much foot traffic there is.


Is it expensive to lay 3D Floors?

Installing 3D floors yourself is cheaper than having it professionally done. Expect to pay around 10$ to 20$ per square foot. Costs involved will depend on numerous factors like 3D flooring materials used, the type of floor, design, and more. Getting a quote is the best option. Doing your own 3D floor is difficult and time-consuming, but possible. If you do follow this route, we hope that the information in this article will help you achieve your goals.

]]>
https://www.epoxychina.com/?feed=rss2&p=66 0 66